Showing posts with label computer science. Show all posts

Tuesday, April 23, 2024

STEM Lab 23_24 Round 6

As you have no doubt come to expect, the penultimate round of STEM lab for the year was awesome, just as its predecessors were. There was a great deal of programming going on this time. Kindergarten and 1st grade returned to their Code.org courses, while 2nd grade took their first steps in the full version of Scratch. The third graders had their first experiences coding the micro:bit microcontroller. Meanwhile, our 4th and 5th graders extended their micro:bit skills by incorporating the device into creative projects.


Kindergarten & 1st Grade

You may recall that the Kindergarten and 1st grade students begin the year in Code.org. The puzzle-based nature of the activities help the students develop their algorithmic thinking skills while also giving them valuable practice with programming concepts like loops and events. Most of the programming activities we do later in the year, such as Scratch Jr and Robo-mouse, have a more creative lean to them. I try to strike a balance between formal coding instruction and creative coding projects so that students not only learn the programming concepts, but also see programming as a tool they can use to express themselves and share their learning. This round was not all Code.org however, as we also did a day of Scratch Jr and completed a building challenge.


2nd Grade

The end of the year is always one of my favorite times with 2nd grade. That is when I introduce them to the full version of the Scratch programming language. Scratch was designed to have a "low floor", so even students who have not programmed before can get started with relative ease. Most of our students have been programming since Kindergarten and are very excited to start using "real" Scratch. I start each class with a code-a-long activity in which I show them some of the similarities and differences between Scratch and Scratch Jr. Following that guided tour, students have some time to explore the new coding environment and to try things out. They very quickly find that there is a lot more to Scratch than there was in Scratch Jr, and this discovery leads to some productive struggle as they work to understand how to create the movements, effects, and sounds they want for their projects. For the rest of the week students work through a set of tutorials embedded within Scratch that teaches them how to use the most common events and commands. I encourage them to put their own creative spins on the tutorials as they go. In rounds 7 the students will complete their first multi-day Scratch project and I cannot wait to see how they do.

3rd Grade

This round the 3rd grade was introduced to the wonderful world of microcontrollers with the BBC micro:bit. They learned that a microcontroller is the perfect device for when you need a computer that will only have one job, such as turning street lights on at night and off in the morning, or opening the doors at the grocery store as someone approaches them. The micro:bit has a number of inputs including buttons, an accelerometer, and sensors for light, sound, and temperature. All of these can be used to generate outputs like images or animations on the LED screen or sounds from the speaker. We spent the first few days of the week practicing with the various inputs and outputs. Thursday and Friday the students were challenged to build a model animal and to use the micro:bit to make their model interactive. The results of the Micro:pet project are always outstanding. Some groups used the device as their animal's mouth and others as its whole face. One group used animations on the micro:bit's screen as the tail of their model cat. 

4th Grade

Fourth grade used the micro:bit earlier in the year in a unit that was a kind of "next steps" continuation of the unit the 3rd graders did. They learned to use the micro:bit's input/output pins, more of the device's sensors, and generally created more complex programs. In this round the students used the micro:bit in conjunction with a breakout board kit called Crazy Circuits from Brown Dog Gadgets. The breakout board gives one easy access to the full array of pins on the micro:bit. The kit includes additional hardware like LEDs that students can connect and program. This is the first time we have used these kits in the lab so there was a bit of trail and error as we worked out the best ways to employ them. We worked it out though and at the end of the week the students used the a selection of Legos to build a scene from a story of their choosing which they then animated with the micro:bit and the breakout board components. While there was a bit of frustration at the limited Lego resources the students were given, that constraint by and large inspired creative work arounds.

5th Grade

In keeping with this round's micro:bit theme, 5th grade used a different breakout board and handful of components to create "moving masterpieces" or "animated artworks". We started the week by learning to wire LEDs and a servo motor to a breadboard. Most of the students used breadboards last year and were familiar enough with them to assist those who are new to Sinclair this year. Once the wires were all in place, students coded the LEDs to blink and the servo to rotate on a button press. They used this program as a starting point for their projects later in the week. I showed them one example project, my personal riff on Van Gogh's Sunflowers with a couple blinking LEDs and a moving butterfly, and then instructed the students to think of what they wanted to create. I made a few suggestions like book covers, scenes from movies, or some random silliness, but left the final decision to them. (I do not like to give the students too much direction for fear of stifling their creative process.) Over the next few days the students, some working independently, others with a partner created their image, mounted it to a file folder, added the LEDs, servo, and wires to the breadboard. They tweaked the original program to incorporate more LEDs or multiple servos, and to make the lights and motion fit with their vision. I was not disappointed with their work... so much impressive creativity!


Wednesday, November 1, 2023

STEM Lab 23_24 Round 2

I have been so busy being amazed by the incredible work the students are doing this round, I just realized that I had yet to write the blog post about it!


Kindergarten & First Grade

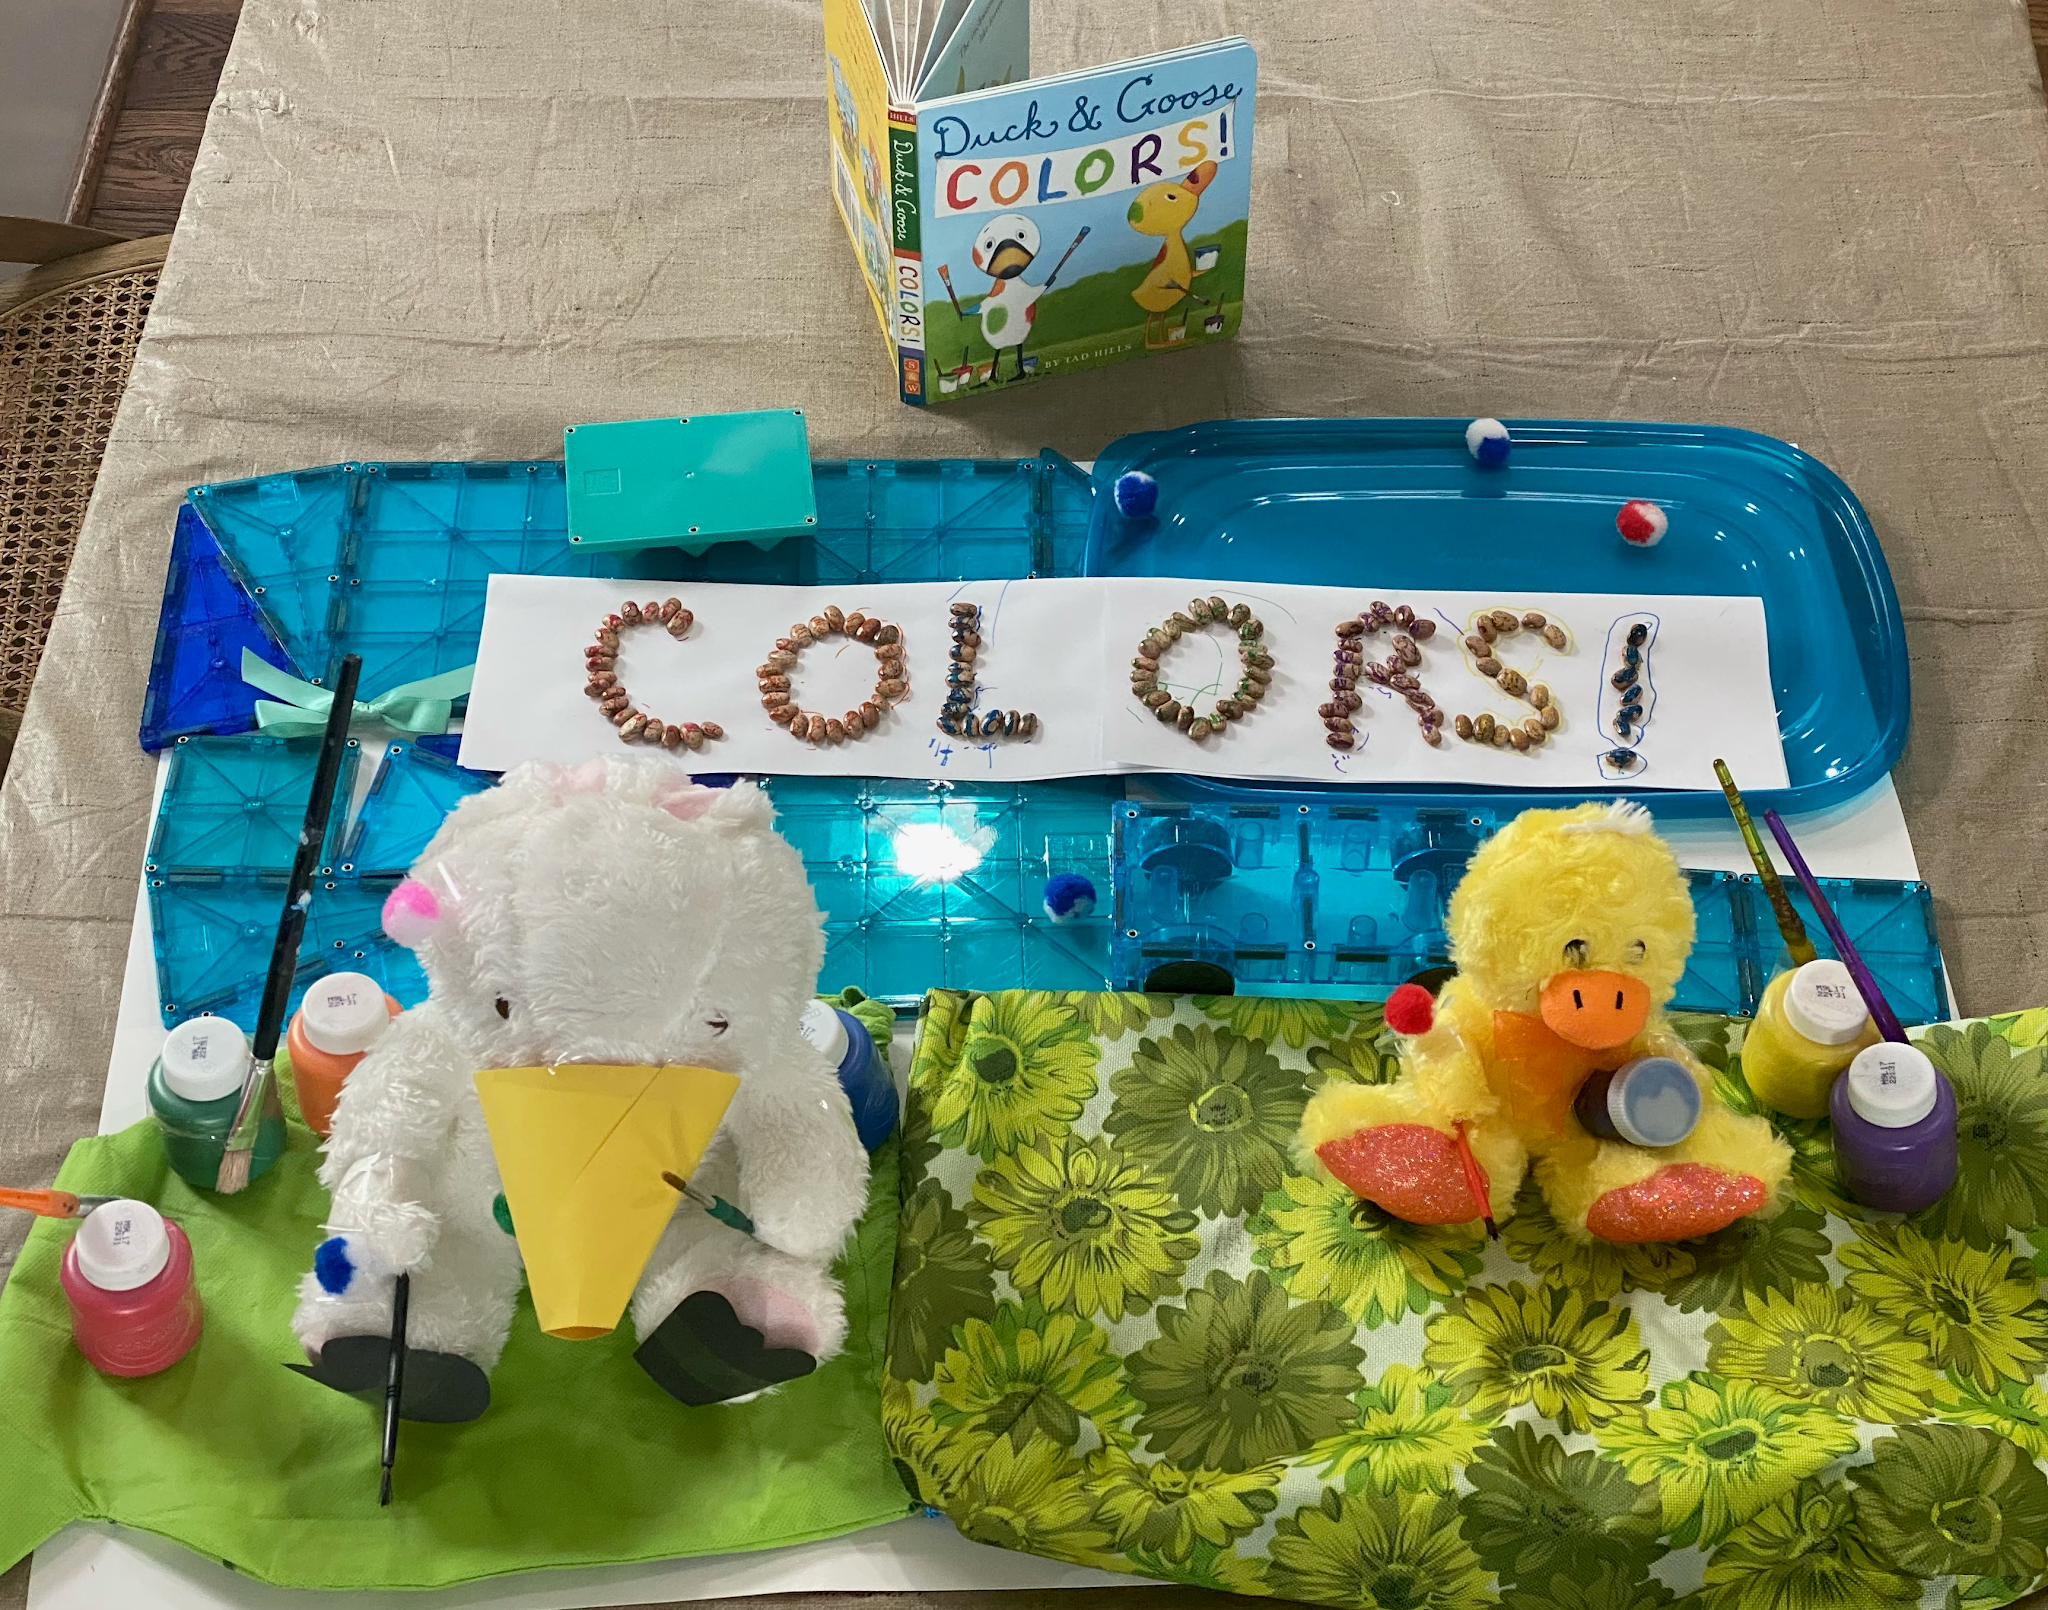
This round is one of my personal favorites, Math Stories. In this unit, each day starts with a picture book that centers on some kind of math concept. Some of the books tell stories, while others are more like counting books or math puzzles. Each grade level's books feature a variety of math topics including number sense, geometry, measurement, multiplication, and general problem solving. After the day's reading, students complete a hands-on activity related to the math concept covered in the book. Sometimes the activity is a bit like an art project, other times it is practice employing a particular tools or strategy. What I love about this unit is the chance to pair two subjects (math and literature) that students too often think of as related. 


Second Grade

This past summer I was fortunate to be able to travel with Lindblad Expeditions and National Geographic as a Grosvenor Teacher Fellow to the high arctic archipelago of Svalbard. (You can read more about the particulars of that experience here and here.) This is the first project inspired and informed by my fellowship experience. I have done other iterations of this project before, but this time it was fully centered on the arctic. We started with a photo highlights tour of my time in the arctic. Then students chose one of the arctic animals from a list and researched it using the National Geographic Kids website. Part of the note taking process included drawing the animal and its habitat. Those drawings served as practice for the elements that were included in a Scratch Jr project about the selected animal. Students drew their animal's habitat and several versions of the animal. These drawings were photographed into a Scratch Jr project and coded to share information that students gathered from their research. This is one of the first projects students in the STEM lab complete that combines physical and digital elements and the results were amazing.


Third Grade

A perennial favorite in the lab is cardboard arcade, and this round saw 3rd grade get their chance with this project. Many of the current 3rd graders remember getting to visit the lab in 1st or 2nd grade to play cardboard arcade games and there were cheers from several students in each class when I announced the project for the week. We start by watching the short film Caine's Arcade for inspiration and discussion. Then students begin brainstorming and planning their games in their STEM lab journals. The middle of the week is spent building, testing, and making necessary adjustments to the design. At the end of the week finished products are presented to a visiting group of students from 1st grade along with administrators. These presentations are an important part of the design process in the lab. Sharing their work with an authentic audience gives the students a chance to practice talking about what they have created and what they have learned from the building process. The presentations also serve to inspire the younger students when they see the kinds of projects they will get to do as they progress through the STEM lab curriculum.


Fourth Grade

For the 4th graders, this round was the first half of a 2 part project. The end result will be an interactive biography programmed in Scratch and controlled with a physical display. Part 1 involves researching the life and important contributions of a well known artist or scientist. They had their choice of 11 different people as well as the choice of whether to work alone or with a partner. Once they had completed their research, students moved on to the Scratch project. The programs are run with key press events which will allow them to be controlled in part 2 with the Makey Makey and the physical display. Students had to find 3 relevant images and at least one map to include with their program. We had some great discussions about using images to illustrate the information being shared in the program. In round 2 the students will share their completed projects with a visiting class and administrators. 

The Scratch biographies can be found in this studio. (Some are still works in progress.)

Fifth Grade

Like 4th grade, the 5th graders started work on a two part project. This one is called Tiny Museum. The students conduct research on a chosen topic and use Scratch to create a virtual museum room with artifacts and images that share what they have learned. The project includes a narrator that serves as a digital tour guide to the exhibit they have put together. The topic choices I gave them were inspired by my aforementioned National Geographic fellowship. I wanted them to focus not just on the basic information about the topic, but also the impacts human activities are having on the arctic ecosystem. The second part of their project will have them building a physical model of their museum room and wiring a switch to the door that triggers the tour guide to start start speaking upon the door opening. 

Here is the studio of virtual museum rooms. (The projects at the top of the studio are very much works in progress because our 5th graders went to camp the last week of the round, so they only had 2 days to work on their programs.)

Tuesday, December 20, 2022

STEM Lab Round 3

It has been another great rotation in the STEM Lab! We have done a lot of programming, some building, and also gotten into some physical computing. Read a bit about what each grade level has been up to the last few weeks.

Kindergarten & 1st Grade

You may recall that Kindergarten and first grade started the year working on computer science and programming courses in Code.org. These puzzle based lessons are great for teaching concepts and helping students practice skills, but there is not much scope for student creativity. That is where Scratch Jr comes in. 

Scratch Jr is new to most of the Kindergarten students so we start with a refresher on what it looks like to write a program in Code.org (which they used at the start of the year) and compare that to the Scratch Jr environment. Each day I show them what they will be programming and talk about the command blocks they will be using. Then the students go to their seats and we code together. They are allowed to choose their own characters and backgrounds, but they copy my code at this point. When we finish coding together the students have what we call "creative time" when they are allowed to change their program and project by adding or deleting characters, choosing new backgrounds, and writing new code. 

The first graders who attended Sinclair last year are familiar with Scratch Jr, though there are always a few new faces, so we start with just a brief review the programming environment. The daily lesson outline is fairly similar however. I talk them through the day's program as I show how it is built. That is followed by the code-a-long and then creative time. In first grade I teach the students how to change scenes and use the message events to coordinate the actions of the characters so that they do not all run their code at the same time.

Throughout this round I was quite impressed with the creative projects the students in both Kindergarten and 1st grade created. They did a wonderful job of creating personally meaningful scenes and stories while quickly grasping the programming concepts necessary.


2nd Grade

The work Kindergarten and 1st grade did in Scratch Jr lays the groundwork for the digital diorama project 2nd grade completed in round 3. On their previous rotation through the STEM Lab, 2nd grade conducted research into an animal and took notes about it in their journals. The next step had them use those notes and the Nat Geo Kids website to guide them as they drew pictures of their animals and their animals' habitats. We talked about the elements of scientific drawings (big, colorful, and accurate) as well as being comfortable with one's best effort (it doesn't have to look like a photograph). These elements were photographed into a Scratch Jr project, the habitat as a background and the animals as characters, to create the dioirama. Students then programmed their characters to move around and to talk sharing facts about the chosen animal. 

I do some variation of this project most years. It serves as the first STEM lab project students complete that involves research along with both digital and physical elements. Most of the projects students work on in 3rd through 5th grades are patterned on those pieces, so I like to get the 2nd graders ready with projects like this one.


3rd Grade

This round 3rd grade embarked on the first of a 2 part project. Part one has the students creating a Scratch project that teaches the user about a topic. The project must use key presses to activate the various parts of the program because in part 2 they will design and build an intereactive poster that will connect to the Scratch project using the Makey Makey. I presented them with a list of topics from the 3rd grade science curriculum. Students chose either to work alone or with a partner and then used resources like Brain Pop and Britannica to research the topic selected from the list. Once their notes were complete I showed the students how to plan their projects. The basic formula is key press plus picture plus facts. That is, each key press should display a picture related to the topic and share facts relevant to the image. I had the students begin working on their projects before teaching them how to find and add pictures.

The studio of projects can be found here. (Disruptions caused by baseball, boil water notices, and fundraiser rewards mean that some of the projects are more of a work in progress than others.)

4th Grade

The Micro:bit has been an important piece of technology in the STEM Lab for some time. Fourth grade returned to this small but mighty microcontroller for round 3. Last year when they were introduced to the Micro:bit, students worked on making use of the basic inputs and outputs of the device and on becoming comfortable with the block-based programming environment MakeCode. MakeCode feels familiar because it akin to Scratch. However, the structures are different and can take some getting used to. We started the unit with a review session meant to refresh the memories of the students who used Micro:bit last year and to initiate those students new to Sinclair this year. Over course of the week students learned to used the Micro:bit's input/output pins to light LEDs. They used the environmental sensors (light level, temperature, sound level) and conditional statements to generate outputs that vary depending on the sensor input. The accelerometer (tilt sensor) was used to sound different notes based on different tilt gestures. The challenge was then to use the Micro:bit to play Twinkle, Twinkle Little Star. 


5th Grade

Fifth grade completed and presented their mini museum projects this rotation. In the prior round they used Scratch to build and program a digital museum room, complete with virtual docent to narrate, about a self selected and research topic. This time out they built a physical version of their room and the objects within. They used copper foil tape to built a circuit on the room's door which was connected to their Scratch projects with a Makey Makey. Openning the door to the physical room closed the circuit and triggered the virtual narrator to begin describing the objects in the room. Most classes got the opportunity to present their projects to visiting 2nd grade classes and administrators. The Echo magnet group also had the opportunity to share their work with Houston ISD Chief Academic Officer Dr. Bird and members of the Instructional Technology Department.

The Mini Museum Room Scratch projects can be found in this studio and a sample video of presentation day is below.


Friday, September 17, 2021

Third Gets Unstuck in Scratch

 Last year I got the chance to participate in the creation and piloting of the Creative Computing Lab's Getting Unstuck Curriculum materials. The Creative Computing Lab is part of the Harvard Graduate School of Education and oversees a number of programs designed to support teachers and students in using Scratch. The Getting Unstuck materials grew out of a summer experience they organized for educators in 2018 and 2020. There are 10 modules, each with a variety of elements that help teachers plan for instruction and to guide students through the unit. One of the best things about the documents is how flexible they are. It is possible to pick and choose activities that are best for each particular group of students, and to fit the time available.

At the end of last year I introduced the second graders to Scratch. In a sense, they "graduated" from Scratch Jr, which they had been using since Kindergarten. They worked though several short projects that helped them become familiar with the interface and what it could be used for. I did not have them work in the online version of Scratch because of the distractions created by the ability to comment on projects and see inside other people's projects. This first unit of the year introduces the students to the Scratch online community, project sharing, and collaboration.

We started with a review the digital etiquette expectations and online safety guidelines. These have been part of every computer programming unit since these students were in Kindergarten, and I was pleased with how well they were able to recall them. Next students logged into Scratch for the first time. Once they were logged in, students have some time to explore and refamiliarize themselves with the coding environment. It has been amazing to see and hear their excitement as they create and share their work with others.

I selected the module on "parallelism" (2 or more things happening at once in a program) for this unit. It is an accessible concept for those students who are new to computer programming, and it has a lot of room for creative expression. We started by exploring some "inspiration projects" collected in a studio by the Getting Unstuck team. Students tried the projects, tinkered with code, and made observations about how they projects worked. This was also a chance for them to experience one of the most powerful features of Scratch, the ability to see the code behind someone else's project and to make changes to that code (without altering the original). It's a digital equivalent to taking your toys apart to see how they work without having to worry about putting them back together again.

Next students planned their own parallelism projects. The prompt reads: "Create a project that uses multiple green flag blocks to make things happen at the same time". I gave the students a planning page where they could write or draw their ideas. Then they got to work. So far, I have been impressed with how different the project ideas are. One of my goals in the lab is to give my students creative confidence. That is, I want them to feel safe to follow their own ideas and interests rather than looking around the room to see what others are making. 

Each day I introduced them to another element of Scratch and how I expected them to work in the community. They shared their projects to the studio. They completed the project page including instructions and a reflection. We discussed the importance of commenting one's code and the students added comments in their projects. The week ended with learning to leave helpful comments on other people's projects. For this we follow the Heart and Star model. A "heart" is a specific positive comment on project, something like "My favorite part of your project is...". A "star" is a suggestion for s fix or improvement. I stress to the students that the star is not necessarily a problem to fix (though it could be). A star could be a suggestion to add music or more challenging levels. It could also tell an easier way to accomplish something in the program. Each student commented on at least 2 projects in the studio.

There are a couple projects embedded below (just click the green flag to run them). The full studio of projects can be found here: 3rd grade parallelism.


Monday, September 6, 2021

It's Code.org Season in the STEM Lab

We have had a fantastic first 2 weeks in the Sinclair STEM Lab! Things are not exactly normal, but a bit more so than last year and I am grateful for that. I have enjoyed seeing familiar faces in person rather than on a computer screen, and it has been great to meet so many new-to-Sinclair students. 

Each year, my Kindergarten, 1st, and 2nd grade classes begin with a computer programming unit based around Code.org activities. For the Kindergarten students this is their first taste of computer programming. The lessons are a mix of screen-based and unplugged activities. The goal is to develop their algorithmic thinking skills and prepare them for more creative computing tasks to come later in the year. 

I like to start 1st and 2nd grade with Code.org every year in order to review with the returning students, and to introduce students who are new to programming. These older students also participate in a mix of plugged and unplugged activities. Creative computing is a central part of what students do in the lab and the Code.org puzzles help those new students become comfortable with block based programming before they are exposed to Scratch Jr, and later to Scratch.

The last day of the week is what is popularly called Free Build Friday. Students get creative with whatever materials are supplied that week and build whatever they want. I am always so impressed by what they think to construct.


Monday, September 28, 2020

Starting the Year in the Virtual STEM Lab

Now that the first 3 weeks of the strangest school year of my career are behind us, and we have settled into a rhythm of sorts, it seemed like a good time for the first blog post of the year.

The lab schedule and projects were created in order to minimize stress on families. Synchronous whole group meetings were set for Monday to introduce the projects and Friday to review and share. The projects varied by grade level of course, but the theme across the board was "plugged or unplugged". I wanted students and families to have a project choice that did not involve a computer because I am well aware of how much time the children are spending in front of the computer already.

The "plugged" option for my Kindergarten, 1st, and 2nd graders had them working in their grade level Code.org courses. It was a bit different this year since the unplugged activities are a bit of a challenge to lead in a Teams meeting. The students who have chosen this activity have done a great job progressing through the lessons. I have been most impressed however with the quality of their responses to the reflection prompts. (These get submitted through our district LMS called the HUB.) It was great to see their excitement about successfully completing the puzzles at each level and to see them reflecting on what they had learned. So far my favorite response to "what is one thing you have learned this week?" is from a 1st grader who noted, "I learned that there is more than one way to do things". That is one of the key messages in the STEM Lab.

The 3rd, 4th, and 5th graders' "plugged" choice involved using the Scratch programming language to create a project. The 4th and 5th graders are familiar with Scratch for the most part and I challenged them to create an animated book review project. The 3rd graders missed out on their traditional introduction to Scratch at the end of second grade, so they are mostly new to the platform (though most have experience with Scratch Jr). Their task was to create a project that introduced themselves to others. In both cases I provided examples, but encouraged the students to be as creative as they wished with the form their projects took. I have not been disappointed so far. The 3rd graders are doing an amazing job of problem solving their way through this new programming environment, and the 4th and 5th graders are extending their skills through some playful experimentation.


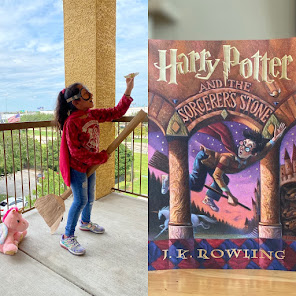
The "unplugged" activity was the same for everyone, Kindergarten through 5th grade. The challenge was to use whatever materials they have around to build a 3 dimensional model of a favorite book cover. I showed the students a few examples, but again, they were encouraged to be as creative as possible. The only rule was no 2D products. I have gotten so many amazing projects back so far. This building project has proven to be a bit more of a popular choice than the coding project. I am not terribly surprised by this because when I told the classes in our meetings that they had a non-computer choice there were many looks of relief.


As I mentioned above, there is a reflection piece to these choices. The prompts vary by grade level a bit, but are all aimed at getting students to reflect on what they learned, the quality of their work, and to think about how they might improve their projects in a second iteration. One of my favorite prompts is the one that asks students to choose 3 adjectives to describe their work. Some responses I have enjoyed from a variety of students include "challenging", "surprising", "awesome", and "breakable".

We have a few weeks left of fully digital learning. Beyond that point there are many unknowns. But whatever may come, I have loved seeing the students' work, and I know that we will find a way to continue making together.


Saturday, July 18, 2020

Getting Unstuck 2020

This has not been the summer that I imagined. I know that holds true for everyone, teachers, students, and parents alike. The ongoing uncertainty regarding the coming school year has been challenging to manage, and has become more so as June has become July, and July slides relentlessly towards August. The current state of affairs has created a paucity of things to get excited about. There are no trips to take, no conferences to go to, no gatherings to attend.

Enter the Scratch Ed Team from the Harvard Graduate School of Education with Getting Unstuck. The Scratch Ed Team works to support teachers with incorporating creative computer programming experiences into their classrooms using the Scratch Programming Language. The Creative Computing Curriculum Guide shares ideas and strategies meant to be adaptable to any computing classroom, afters school club, and other educational spaces. This guide is paired with the Getting Unstuck strategies that offer ways for educators to support their students with problem solving their way through a creative project. Together they help answer the questions, "how can I engage my students in creative computing? and, "what do we do when we get stuck?". These resources are open source, available to all, for free. 

The Getting Unstuck summer learning experience was designed for educators, formal and informal, to connect and support each other through creative Scratch projects. Each week day, from July 6 through July 17 participants received an email containing an open ended programming prompt. There was a link to a studio for people to share their projects in. The studio serves not just a as a warehouse for projects, but as a place for people to draw inspiration, learn how to do things, ask questions, and to gather and offer feedback to each other through the comments feature of Scratch. In addition to the communication tools in Scratch, there was a Twitter hashtag (#GettingUnstuck) to follow and a Facebook group where participants could interact to work out bugs and share tips. Finally, there were two live video meetups for people to gather live to talk about their projects, teaching, learning, and anything else that came up.


I have long felt that the best professional development is teachers talking to other teachers. The Getting Unstuck experience is the best example of this kind of learning. Over the course of this 2 weeks I connected with many dozens of educators from around the world. I saw hundreds upon hundreds of inspiring Scratch projects. I learned new ways to use Scratch, explored elements of the language I am unfamiliar with, and collected inspirations for student projects to last me many years. 

I had the great pleasure to serve as a facilitator for Getting Unstuck. As such, I spent many joyful hours checking out projects in the studios each day helping participants debug their programs, offering tips and encouragement in the comments, and feverishly taking notes in support of my own learning. During the two video meetups I acted as one of the breakout room small group facilitators. Getting Unstuck would certainly have been the highlight of my quarantine professional development schedule on its own. Getting to work alongside Karen and Paulina from HGSE, and Kimberly and Susan, both teachers with a wealth of experience teaching with Scratch, made the experience not just inspiring, but transformative. Heretofore it has been tough to muster much excitement about planning for the new school year given that so much of how it will go remains a colossal question mark. Now, at the conclusion of two weeks of intense making, learning, and connecting, I have finally found the energy and the sense of purpose I need to start crafting my lessons. 
 
Today's live meetup ended with each of the 50+ participants individually unmuting themselves and sharing one word for how they are feeling here at the end of our Getting Unstuck adventure. Inspired, grateful, creative, empowered, and joyful were just some of the words given. I am feeling all of those.

My words cannot fully express how grateful I am to everyone who participated in Getting Unstuck 2020. The energy and inspiration I have received from this community will sustain me through the many challenges that lie ahead. 


Each day's Getting Unstuck studio with everyone's projects linked from this page.


Wednesday, February 5, 2020

Digital Dioramas and Skype-a-Scientist

This rotation in the STEM lab has the second grade taking their first steps into combining physical elements with digital ones to create projects. In my almost entirely self-designed curriculum, this kind of fusion is the ultimate goal for the students I work with. 
The students began by selecting an animal to research using the National Geographic Kids page about different species of animals. I let them explore an bit before choosing and starting to take notes in their journals. They also selected partners for this project. I provided the students with a list of facts that they needed to read for and record in their notes, but also encouraged them to include any information that they found especially interesting. Required information included what their animal eats, where it is found, and what threats it faces. We discussed how threats may be natural (predators) or human-caused (habitat loss/ poaching). Finally, they drew a picture of their chosen animal and its habitat in their journals.

Next, the teams worked together to create detailed drawings of their subject animal, its food, and its habitats. They cut out their pictures and practiced animating how they would move around in a Scratch Jr. project. Students used the camera function to photograph the pictures they drew of the habitats as backgrounds. They also added photos of their animal drawings as well as drawings of what it eats and the threats it faces.

Finally, the students programmed their hand-drawn characters to move around and to share facts they gathered through their research. This process was a great opportunity for me to teach the students about a number of different computer science concepts. They are already familiar with the primary event block in the Scratch Jr language, the Green Flag. This event is a general purpose "go" to all of the characters students have added to their programs. However, most of the teams discovered that the Green Flag event has its limitations because it makes everything move at once. When they wanted different characters to move and speak at different times I showed them the messaging events. When they wanted a prey animal to disappear after being eaten, I was able to show them the uses of the "when characters touch" event which is the beginning of understanding conditionals. 


We finished the unit by having each student team share their work on the SMART Board so they could practice providing each other feedback.

Another element of this unit that I personally find super exciting is our video chat with a scientist. This is facilitated by Skype-a-Scientist, a program that matches classrooms with scientists working in a variety of fields. Skype-a-Scientist connects teachers and scientists and they coordinate the scheduling of a video call. This program lets students see and engage with "actual living scientists" who were once sitting in a classroom as they are now. Each class gets to speak to a different scientist with a different area of study, so each conversation is unique. The first group spoke with a conservation biologist in Seattle, and the second group will be speaking with a geologist from the UK. Skype-a-Scientist is a non-profit run by Dr. Sarah McAnulty. I am proud to support this program with a monthly donation, and I would encourage our Sinclair Elementary families, and anyone else who cares about supporting science education to do the same at patreon.com

Tuesday, February 4, 2020

I, Robo-Mouse

It's a new year and the beginning of a new rotation in the STEM Lab. The third grading cycle finds our Kindergarten and first grade students discovering the joys of programming robots with our old friend, Robo-Mouse.

This is Kindergarten's first robotics experience in the lab. It builds on the introduction they had earlier in the year to computer programming via Code.org and Scratch Jr. The first day involves an overview of the proper care and handling of the robots. The Robo-Mouse is quite affordable, but it is not terribly robust and the axles can be stripped a little too easily if students are too rough. Over the years I glad to say we have only lost a few robots to this kind of abuse. Following a brief introduction, students break into groups of 2 or 3 and build mazes and practice programming.

After an exploration day, the students spend a day working with the challenge cards. These two-sided card have a drawing of a maze showing the position of the mouse and the cheese as well as the walls and tunnels. Part of the challenge for students is cooperatively building the maze according to the picture on the card. Once the maze is assembled, the teams work on the programming. The biggest stumbling block I have found in the transition from the Code.org puzzles to Robo-Mouse is that with the robot a turn and a move requires two commands. In the Code.org puzzles, at the Kindergarten and 1st grade levels, students only program movements. Turns as separate commands are not introduced until the 2nd grade.

Once students are comfortable with programming the Robo-Mouse, I introduce them to the algorithm cards. These cards have arrows corresponding to the buttons on the robot that are used for writing programs. Continuing to use the challenge cards, students have the added task of creating their algorithm using the those cards and then programming it into the robot. This helps the teams debug their programs as them can follow along step-by-step and identify where they went wrong.

For 1st grade, the unit begins in a similar fashion, with an introduction to the proper handling and a review of the programming. This is partly because it has been about a year since most of the students used Robo-Mouse, and partly because there are inevitably a few students in each class who are new to Sinclair and have no prior experience with robotics.

They too get a few days to explore and then to practice with the more complex challenge cards. First grade also reviews the use of the algorithm cards. As the students become more comfortable with programming the robot, they seem to become less interested in using the algorithm cards to show their work. I keep on them about it though as it forces them to check and recheck their programs. Otherwise their programming successes look more like trial and error rather than a result of deliberate choices.

The 1st grade only spends a couple of days on the challenge cards. Their real project for this unit is to use the Robo-Mouse as part of a story retell. Students create a story map of a tale of a familiar tale. They then illustrate the important points in the story and place these along a path that they build for the robot. The robot gets programmed to move along the path and as it passes each illustration, the students recount that moment in the story. I model every part of this process using a book that I read to them at the beginning of this phase of the unit. This year I have been using I Want My Hat Back by John Klassen. The story the students have been retelling this year is The 3 Billy Goats Gruff. In most things I give the students choices about this kind of thing, but I have found that for this kind of project, with 1st graders, a choice of stories leads to overly ambitious choices and students do not have enough time to complete the story they want to tell.

So far this rotation, the best thing I have overheard is a couple of first graders struggling with a particularly complex maze of their own design. The student whose turn it was to program groaned, "Ugh! This is so hard!". Their partner agreed, "Yeah, it is," and then added, "but it's fun too." The first student replied, "Yeah, I know" and then they both went back to work debugging their program.


Friday, January 3, 2020

Two for One Blog Post - Interactive Posters and Math Stories

The run up to the winter break is is always a busy time. Mine was even busier than usual and the first casualty was my blog posting schedule. So this one will wrap up the work done by the kindergarten, first, and third graders during cycle 2. Then I'll be all ready to go when cycle 3 starts in another week.

Third graders got their first taste of true digital making during this rotation with the interactive posters project. Each class had a different set of research topics to choose from. I try to do this with all of my groups and grade levels. It gives me the chance to see how well various topics work for a particular project. Also, speaking for myself, I like to have some variety in the projects over the course of the unit since I am implementing the same lesson plan 4 times in a row as the classes rotate through the lab. The choices ranged from recycling and energy conservation to birds and fish to objects in our solar system.

Students had the option to work independently or with a partner. They researched their chosen topic and recorded notes in their journals. They then planned a Scratch project to teach about their topic. The plans needed to include backgrounds and sprites they would use, what facts from their research went with each background, and how the sprites would move and talk. I introduced the students to computer programming vocabulary like "event" and "comment". Events are a key part of how their programs for this project operate and commenting one's code is a good habit to get into and one I have been lax in training my students in acquiring. The students also learned how to add pictures from other sources to their Scratch projects. An important part of this is finding pictures that are open source and giving proper attribution in the project notes.

Teams start on the Scratch project together so that both partners are familiar with the basics of its function. After a day or two one partner steps aside and begins work on a poster that complements the Scratch project. When the poster and program are complete, brass fasteners and copper foil tape are added to the poster to create touch points that can be used as key press events to run the various parts of the Scratch program. Turning these conductive materials into "buttons" is achieved by using the Makey Makey input/output board. It is essentially a keyboard connected to the computer via USB without any keys. Wires with alligator clips connect the poster to the Makey Makey which, once plugged into the computer, allows the brass fasteners on the poster to function as key presses when touched.

One of the things I have come to love most about teaching in the STEM lab over the last 5 years is the pure excitement and wonder that students express the first time they try out something made interactive with the Makey Makey.

I wrote a guide to this interactive poster activity that can be found here on Instructables.

Kindergarten and first grade had a unit that centered on math and literacy. Each day we read a story in which some kind of mathematics is involved, different books for each grade level, and then worked on an activity related to the math concept from the book. The books vary a little from one class to the next. Partly that is because of the various interruptions like fire drills and holidays that occur, and partly it is because I do not own a copy of all of the books I would like and have to request them from the public library. Regardless of the books read, the math concepts covered are generally the same. We touch on things like doubling and skip counting. We look at strategies for decomposing and grouping numbers. There is always some measurement and some geometry as well.

I have done some form of this unit for the last few years in the lab and it is always one of my favorites. This unit was born out of my realization that after a couple of year out of the regular classroom I missed teaching literacy, and more specifically books, to my students. My two week units do not allow me to teach novels like I used to, but this unit gives me the chance to read with students again. More importantly, I get to make clear to them the connections between mathematics and literacy that I fear they miss during their classroom reading block.