Sunday, April 21, 2019

Imagining Adaptations

Fourth grade's final rotation in the lab for the school year begins with research into the Earth's biomes. Students started with some note taking on BrainPop and identified the different biomes and the variations in climate and elevation that define them. Next, students formed teams, or elected to work alone, and were randomly assigned one of the biomes. They continued their research using BrainPop along with National Geographic resources and online encyclopedias to learn about the plants and animals that inhabit the biome they were assigned. In particular they were to find the adaptations that organisms in that biome use to survive. The information collected was organized into a table showing the name of the organism, the adaptation, and the role that adaptation plays in keeping the organism alive.

Up until this point, I did not tell students what they would actually be making in this unit because I did not want the product to influence their research. However, with the note taking portion of the project complete, it is time to outline their task. The challenge is to imagine an organism that lives in the biome they were assigned with a focus on giving it the adaptations it needs to survive there. Students planned their organism in their journals complete with labeled sketches highlighting the adaptations. With their plans complete, students used the STEM Lab standard materials of cardboard and paper scraps to build a model of their imagined organism.

Students spent several days working on this part. One of the things I have been focusing on getting the children to understand when they are making things is that just because we are building with trash, it doesn't have to look trashy. It is sort of like a neatness counts idea, but really it is more about getting them to slow down and take their time. Their project being done well is more important than it being done fast.

The final step was for the teams to make a small model of their biome to to display their model in. They also filled out a display card to accompany their work. I invited one of the first grade classes to the lab to visit the imaginary menagerie and the fourth graders had to discuss their projects for a younger audience.

This was a new project for the lab and I am generally pleased with how it has gone so far. However, for future iterations, I am planning on direction students to include at least one adaptation from different categories into their imagined organism. That is, an adaptation for dealing with the climate, an adaptation for getting food, and adaptation for defending itself, and so on. As it was, many of the projects so far have focused on adaptations for doing just one of those things and I want them to think about adaptations helping organisms do all of things they need to survive.


Sunday, February 17, 2019

Animated Artworks

It has become my habit in the STEM Lab to experiment, so to speak, on the 5th graders. When I devise a new project or new activity or practice, I find it useful to try it out on the group of students who will have gone on to middle school next year. That way, the necessary tweaks and alterations can be made for the following year. This unit is not entirely mine as much is adapted from a number of different activities I have seen done by my various Twitter friends.


Having said that, this is very much an experimental unit in which the 5th grade has been working. It is no secret that I do all that I can to bring concepts and skills from other subject areas into my lab projects. I have wanted to implement a unit with a fine arts focus for a while, and I felt like the 5th graders finally had the requisite physical computing skills to be successful. The project involves students creating their own interpretations of a famous artist's work, both digitally and physically.

Students started by doing some research into the life and work of a particular artist. The first two rotation groups got Vincent Van Gogh (because the first group was shorted 3 days due to various interruptions) and the third group is at work on Claude Monet. (I have not settled on an artist for the last group, yet.) These were chosen because they have a wide range of works to choose from. Students selected a work and sketched it into their notes. This gave me the chance to teach some basic drawing techniques which was a novel experience.


Next, students used Scratch to create an animated version of the painting they selected that also shared information about their artist. First they had to download an image of the painting. We used Wikimedia Commons for this because the images are free to use with attribution (which is another thing I have been working to get students in the habit of, citing their sources). They then uploaded that image into Scratch as a background. All of that is something they have learned previously. The next bit, however, took a little practice. They uploaded the image of the painting again, this time as a sprite and used the paint editor tools to erase most of the painting, leaving only the piece they intended to make move with code. In Van Gogh's "Starry Night" this may have been the moon or the clouds, in Monet's "Tulip Field" it was the flowers or the windmill blades. That sprite was then placed exactly over its corresponding place on the background so that it would only appear as a separate element when then triggering event key was pressed. Students repeated this process until they had at least 3 different animated elements in their chosen work. They also added a sprite that told about the life and work of their artist.

Here are a few example projects:
Van Gogh, Irises
Van Gogh, Starry Night
Monet, Boat on the Epte

The second part of the unit moved us into the realm of physical computing with the Raspberry Pi. First I introduced students to the Explorer HAT add on board. It is a self contained set of inputs and outputs capable of running both LEDs and motors. It has a small breadboard (which students learned to use last year) on top for building the circuits. Students are able to program the lights and motors using Scratch, albeit an older version which takes a bit of getting used to for them. Armed with their upgraded skills, students worked in teams to use the Scratch paint editor to create a digital interpretation of their chosen painting. This too takes some practice, but it also allows them to get creative with how they accomplish the drawing. Some use the shape drawing tools and fill them with color, while others use the line drawing tools. Meanwhile, the other partner is drawing the same painting on paper with colored pencils and markers. Both drawings done, the physical and the digital, teams added 2 LEDs to different places on their drawing, wired them to the Raspberry Pi, and programmed them to light up on different key presses. They also drew and cut out a detail from their painting, attached it to the the axle on a motor, and added the motor to the drawing as well. This was programmed to spin on a key press. The lights and motors matched elements in their digital drawing that they had animated on screen, similar to what they did during week 1. They also added a sprite to talk about the artist and the painting.

At this point the rotations are about half over and I am generally pleased with how it has gone so far. I think for the future I will create a gallery of paintings and artists for the students to choose from. Hopefully that will lead to a greater diversity of projects in the gallery.


Saturday, February 16, 2019

Robo-Mouse Runs Again

For Cycle 3 in the STEM Lab, our friend Robo-Mouse returns to play with our kindergarten and first grade classes. This is a new experience for the kindergarten, while first grade was introduced to Robo-Mouse last year. In either case, this is a chance for students to apply their computer programming skills without the screen.

For kindergarten, the unit started with a review of the skills and concepts they have learned so far this year using Code.org. They are reminded of the difference between and algorithm and a program. We go over the strategies they use for debugging their programs. After having their memories refreshed, they worked in their Code.org courses taking turns as the driver (person operating the Ipad) and navigator (person who watches for errors and offers advice).

Next, students are introduced to the Robo-mouse and how to appropriately handle it. (This is an important lesson as the Robo-mouse lacks in durability what it gains in affordability.) This first day is, for the most part, an exploration and discovery kind of day. Their only assignment that day is to build an L shape with the mouse at one end and the cheese at the other, then to program the mouse to the cheese. It's simple and it gives them a feel for assembling the maze pieces and understanding the difference between the turns in Code.org and on the Robo-mouse. In Code.org "turn" and "move" are accomplished with a single command while on the robot "turn" is one command and "move forward" is another. This is a bit of an adjustment for them, but they have mostly figured it out pretty quickly.

After a day of exploration, students practice building mazes from cards and programming the solutions to those mazes. The mazes become progressively more challenging as their skills improve. One of the challenges of the cards has nothing to do with programming, just building it to match the picture. I have found over the last couple years of teaching with Robo-Mouse that this is good for their spatial reasoning. A couple days into this, once they are comfortable using the cards to build their mazes, I introduce the algorithm cards. These are a way for them to keep track of the steps of their programs as number of steps in each solution increases. In a Code.org program every step is easily visible on the screen. Using Robo-mouse, however, once they enter a step into the robot, it is invisible. They can only see if a step is correct when the machine executes it at the intended time. When they watch the cards while the robot runs the program, they are able to see where the program breaks down and make adjustments at that pint rather than returning to square one.

As for the first graders, the unit starts in a similar fashion. Students review programming concepts in their Code.org courses before having an exploration day with Robo-mouse. They are reintroduced to the algorithm cards and debugging strategies. One thing I have them do is record an original maze on grid paper. Basically they are making their own maze cards. I have them record a solution to their maze on the card using arrows like those on the algorithm cards.

First grade's big task with Robo-mouse was using it as an element of a story retell. This started with them creating a story map for a fairy tale or story they like. (I used "This Is Not My Hat" as my example.) The then quartered that paper so that one part of the story was at each corner of a square. Students programmed the robot to go around the square, telling the main events of the story at it traveled from one corner to the next. They found that it is is not as easy as it sounds to tell summarize a story in the 30 seconds it takes Robo-mouse to run the perimeter of the square. It was fun to watch them practice finishing what they were saying before the mouse turned the next corner. I think that in the next iteration of this unit, I will let them design pieces to be the setting and costumes for the robot so that it can act as a character in the story.


Sunday, January 6, 2019

Giving 5th Grade a Hand

This STEM lab rotation find the 5th grade faced with an engineering design challenge. We do a lot of work with the design process in the lab, and even when it is not the focus, it is at the heart of every unit. 

The first part of the process is to understand the task. That includes making observations and gathering information through research. I did not tell the groups what the challenge would be at the start of the unit. However, I did tell them that we would be building several models of mechanisms that move. I also let them know that these activities were meant to provide them with information and ideas they could use for the challenge.


The first make was a two fingered pincher similar to one people use to reach objects on the ground without having to bend over. The two fingers are attached to a piece in the center that the user pulls back bringing the fingers together. Conversely, pushing the center piece forward forces the fingers open. Next, students used card stock paper and brass fasteners to make a scissor mechanism. This is an excellent device for extending the reach of something. Several students had seen the scissor lifts frequently used to reach light fixtures in rooms with high ceilings. Finally, the students made a model of their own hands with independently controlled fingers. Short lengths of straw were attached between each of the joints of the fingers as a stand in for the bones. A string was threaded through each straw and attached to the tip of each finger to mimic the actions of muscles and tendons contracting to pull the fingers closed. Each build was accompanied by a descriptive journal entry of their observations on the device's function and possible uses.


At the start of week two, I introduced the building challenge: design and build a device that can individually pick up a tennis ball, golf ball, cotton ball, and plastic cup and drop it into a bucket. The device must be operated from a distance of at least 24 inches from the objects being picked up. Groups were limited to using a meter stick, cardboard, string, tape, and a few toothpicks or bamboo skewers to make their device work. They started by brainstorming solutions and planning in their journals. Once that was done, they were allowed to start building and testing. Throughout the unit, many groups attempted to make a scaled up version of one of the previous week's models, and some succeeded in doing so. However, the most successful devices were those that adapted the designs in some way. Not every groups was successful, but in the STEM lab that is OK so long as students can articulate why they failed and how they might improve their design given more time. 


I had not done this unit for a couple of years, but I love it because of the variety of designs students create that all complete the same task. It is so important for students to see and to experience that for many questions or problems there are many correct solutions.


It's Time to Light the Lights

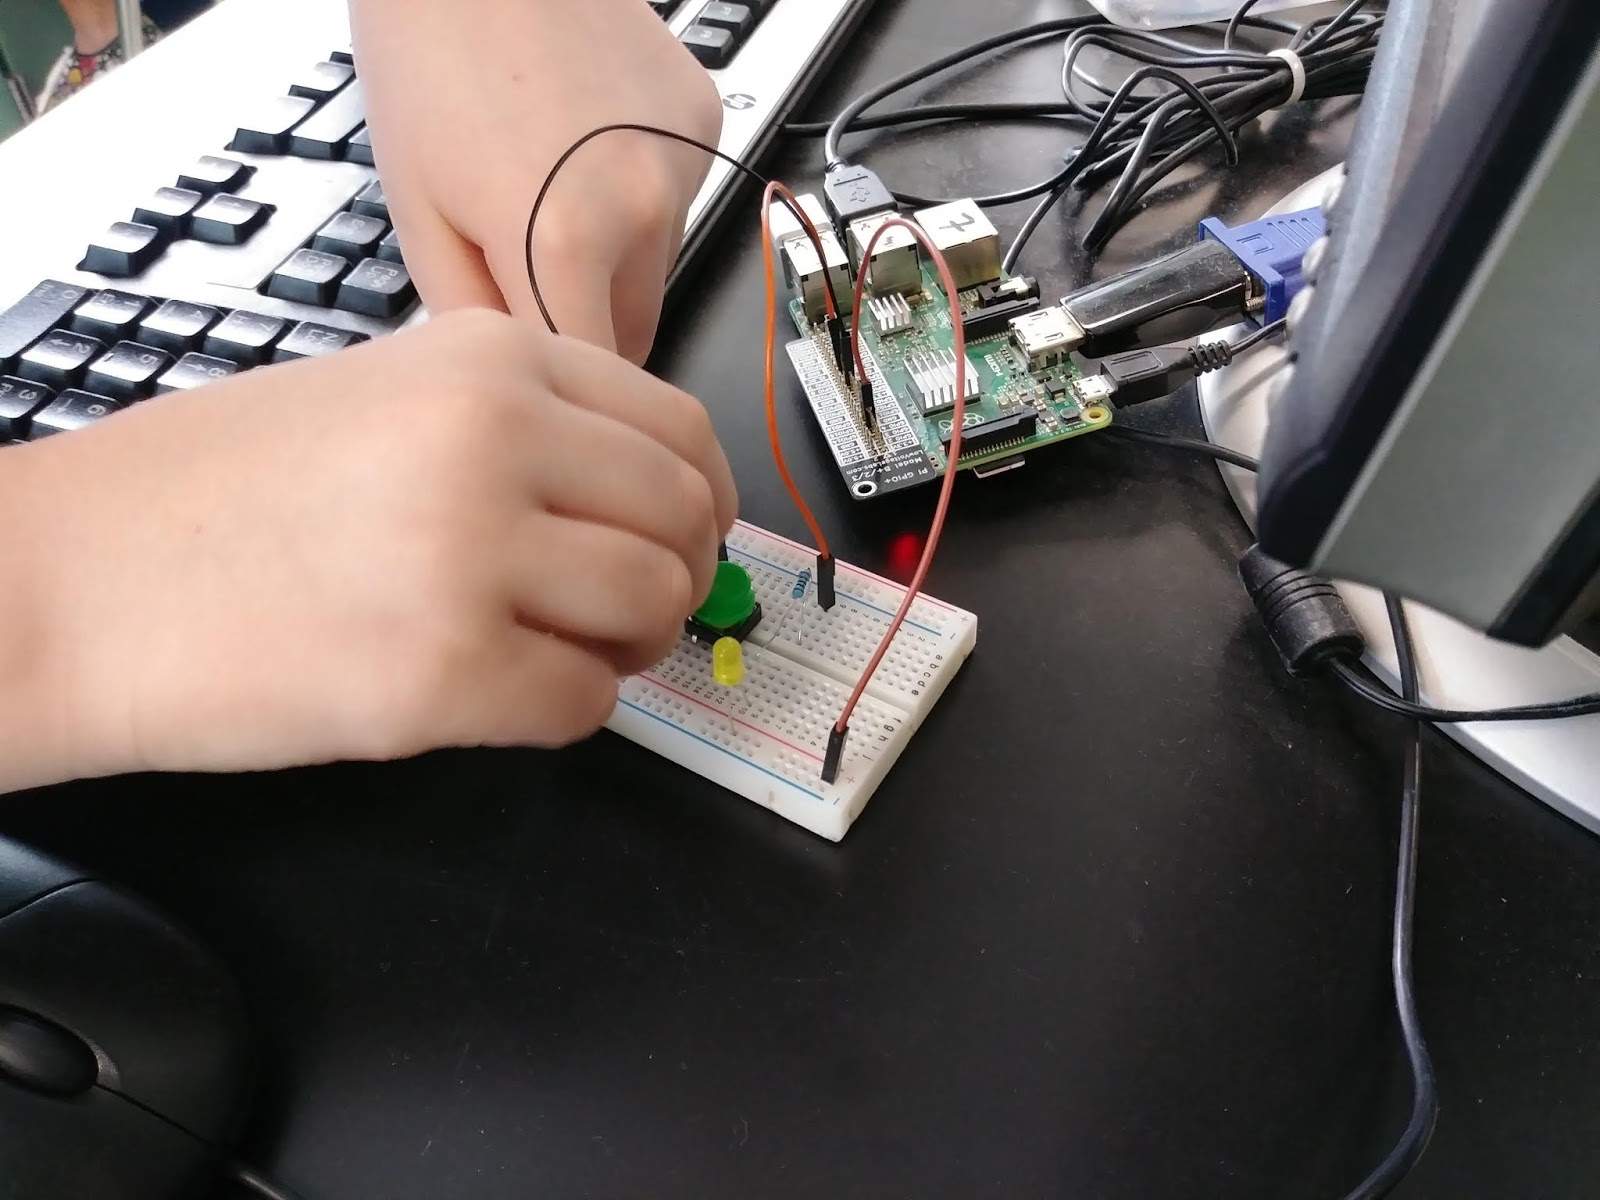
For their second turn in the lab, fourth grade is taking their knowledge of circuits to the next level using the Raspberry Pi computer. During their classroom science lessons on electricity and circuits, students learned to create complete pathways for electricity using regular light bulbs and D-cell batteries. In this unit, they used the kinds of electromechanical components employed by digital makers, LEDs, breadboards, resistors, and tactile buttons.

We started by spending a couple of days getting acquainted with these new components. Students built simple circuits using a battery pack and an LED. Then they added a button that could be used to turn the light on when it is pressed and off again when it is released. They had a good deal of time to experiment and tinker adding more LEDs. An interesting discovery many students made is that the LEDs require slightly different voltages so depending on how the circuit was set up, some lights would not light together. My favorite part of this segment of the unit is, after getting all 4 of their LEDs glowing, the teams start clamoring for more lights.


After learning to control their circuits mechanically (with moving parts like a button), students moved to the Raspberry Pi stations to learn how to take control digitally (with computer code). They started by using an add on board called Traffic HAT. Traffic because it is a set of 3 LEDs in red, yellow, and green resembling a stop light, and HAT for Hardware Attached on Top. This saves them from the distraction of learning a new way of wiring the LEDs while also learning the programming constructs that are used to control the circuits. The versions of Scratch that are embedded in the Raspberry Pi operating system have extensions that allow for physical computing (using a computer to control or gather information from physical components like LEDs, motors, buttons, and sensors). This is my favorite part of the entire unit solely because of the excitement that sweeps the room as LEDs begin to blink. What inevitably follows is students tinker with their code creating new effects, then call out to their neighbors to show what they have done.


Next, after becoming comfortable with the coding and still using the Traffic HAT, students use a breadboard and wires to add a button that they can use to control their LEDs. They also learn that the button can be used to make things happen on the computer screen. It can make characters talk or move, backgrounds can be changed, and just about anything else they can imagine. After that, I remove the Traffic HAT and provide students with a box of components like those they used at the beginning of the unit so that they have to build all of their circuits from scratch. Their final task for the unit is to create a game of some kind that uses at at least two LEDs and one button. I provide them with a guide for making a multiplication facts game, but they have the freedom to make any kind of game they want. Some make the math game, while others make quizzes about dinosaurs, Texas history, or Pokemon.


As always, I have been genuinely impressed by all of the creative ways the students have applied their new physical computing skills to the creation of projects that represent their interests and personalities.


Sunday, December 30, 2018

It's Cardboard Arcade Season in the STEM Lab

One of my favorite STEM Lab projects, and one of the most over all successful, is the cardboard arcade. It is one of the few units that I have run every year since founding the lab and I have yet to get tired of it. That's because after hundreds of cardboard arcade games passing under my gaze, I am continually surprised by what the students come up with. I have settled on doing this project with 3rd grade for no better reason than it helps students learn the construction techniques that I want them to employ going forward. It demonstrates in a very real way that masking tape is not the best material to hold to large pieces of cardboard together with when people are going to be throwing balls at it for an hour.


For anyone who is not familiar with this unit, it is one of many offshoots from the original Caine's Arcade seen in the movie at the link. In short, a 9 year old boy in Los Angeles named Caine spent the summer at his father's auto parts store and entertained himself by making replica arcade games with the left over boxes around the shop. Filmmaker Nirvan Mulick discovered Caine's Arcade when he stopped in to by a door handle for his car and made a movie about it. Since the film debuted the cardboard arcade has become a staple of the maker movement in schools. 
One of the best parts of this unit is inviting other classes, usually first grade or kindergarten to the lab to try out the games. I have found that when students know they will have an audience from beyond their class and me, they become more deeply engaged and personally invested in their work. They are more apt to take creative chances that result in project far more wonderful than anything I could assign.


Friday, December 21, 2018

Use The Forces!

This rotation of STEM Lab finds the second graders exploring forces and motion by building mazes and marble runs. This is one of those experimental units that I implement from time to time. As a result, each group's experiences and projects were a little different as I tweaked and adjusted based on how well various activities went in previous interactions.

The unit began with students recording some simple observations in their journals how a marble rolls around in a paper box lid with some straws taped to it. I gave them some starter questions, 'how does the marble move when the box is flat? When you tilt the box?' and so on. We discussed their observations and then did some research into force and motion with Brain Pop Jr. Students took notes in their journals about words like motion, position, and force. We discussed how these terms related to their observations.


The first build of the unit was a marble maze using Lego bricks. A Lego plate is, of course, covered with bumps which effects how the marble rolls. This gave us the opportunity to talk about friction and how a rough surface is not as good for rolling objects. What I have ended up loving most about this part of the unit is how creative the students were with their mazes. I saw mazes not just with dead ends, but traps that it was impossible to escape. There were tunnels and bridges. Some mazes had checkpoints that had to be reached in a certain order. Several had the kind of elaborate back stories that second graders specialize in telling. Sure, they learned about the pull of gravity and how the walls push back on the marble to stop it or change its direction, but the creative expression was the biggest win.


The second build brought us back to cardboard box lids and straws as we shifted to making marble runs instead of mazes. The first time through this part I learned the distinction between a "maze" and a "run" was not clear to a number of students. This became evident as the first batch of attempts had dead ends that prevented the marble from reaching the bottom of the box. A bit of explanation and the added constraint that their runs could not have straws that the marble does not touch, and the results improved dramatically. Students were challenged to make runs that used a certain number of straws and that took certain amounts of time to complete the course. I have been really impressed by how the students problem solved for the different design requirements.

There are definitely some things I would adjust about this unit, like additional building materials, surfaces, and marble sizes in order to more deeply examine the effects they have on the outcomes observed. Overall though I am fairly pleased with how this went and I look forwards to its next iteration.