Showing posts with label LEDs. Show all posts

Sunday, June 2, 2024

STEM Lab 23_24 Round 7 - Wind Whipped Edition

STEM Lab year 9 is coming to a close, and we are definitely finishing on a high note. For kindergarten and 1st grade, this round was a chance to apply their programming skills to a multi-day project. Second grade planned and programmed their first project in the full version of Scratch. In third grade we explored the connections between the fine arts and creative coding. The 4th and 5th graders had their first experiences with text-based programming using the Python language. 

As I have begun thinking about the 10th anniversary of the Sinclair STEM Lab next year, I have also been thinking about how the lab got started. When the task of creating the lab was appointed to me, I was given an extraordinary amount of freedom in terms of lessons, projects, and content. It has been a great deal of work to develop a curriculum for 7 grade levels, and there has been a fair amount of trial and error over the years. Looking back at posts here from the early years of the lab what stands out most to me is how this space has evolved and grown. Credit for that development goes in large part to the students. It is thanks to their ideas, their enthusiasm, their creativity, and their feedback that the STEM Lab is the place it is today. 

Kindergarten & First Grade

I had a number of project ideas that I was considering for this final round, but ultimately my love of incorporating literature into computer programming won out. The students used Scratch Jr to create an animated retelling of a self-selected story. First, I read the class a book and modeled how they would create their story plan. We reviewed the elements of a story, including characters, setting, and plot. Then the students chose a story and created a plan. When the plans were finished, they began working on their projects in Scratch Jr. Most of them had to use the drawing tools to create the characters and settings for their stories. Next they programmed each scene using the broadcast commands to ensure the characters spoke in turn and that the scenes advanced automatically. I was really impressed with how well the students persevered through the challenges. 


Second Grade

In round 6 the second graders made the transition from Scratch Jr to the full version of Scratch. In that round each day was its own project. The students completed a different tutorial every day selected to give them time to practice with the most commonly used commands and structures of Scratch. In this round the students applied what they learned in round 6 to the planning and creation of a multi-day Scratch project with the theme "All About Me". In the final program when the letters of the student's name are clicked the letter changes its appearance and shares a piece of information about the student. First the students made a 3 column chart to plan what each letter would change into and what it would say about them. After that they went to work in Scratch. They wrote a script that set each letter in the correct place and with the correct appearance at the beginning of the program. Then they wrote the scripts that cause the letters to react when clicked. As with the K and 1st grade project, many students needed to draw their own sprites because the thing they wanted to change into is not one of the sprites preloaded into Scratch. 

Third Grade

One of the most important parts of the STEM Lab is making connections between the elements of science, technology, engineering, and mathematics, and subjects like language arts, literature, history, music, and visual art. (The siloing of subjects into individual, unrelated units is one of my greatest frustrations with the way so much of the modern school curriculum is done.)

For this unit, the 3rd graders explored the intersection of art and computer programming. As always we used Scratch. The music extension allows students to compose music, while the pen extension turns sprites into drawing tools that can be programmed to create images on the background. We started with a day of exploration for each extension. Students were provided with a brief step-by-step guide and some starter code that they were expected to tinker with until they had something original. Following that, students designed and programmed a project that included both the pen and the music extensions. I gave them a checklist with a few elements that had to be included (though these were deliberately open end to allow for individual student creativity), but they were encouraged to personalize their projects as much as possible. The studio including all the projects can be viewed here.

Fourth Grade

The 4th graders have done a fair bit of work this year building physical circuits and writing programs to control the behavior of those circuits. To wrap things up, the students were introduced to the Raspberry Pi computer. The Pi is about the size of a credit card, costs as little as $35, and was designed as a tool to make programming and physical computing accessible to all. 

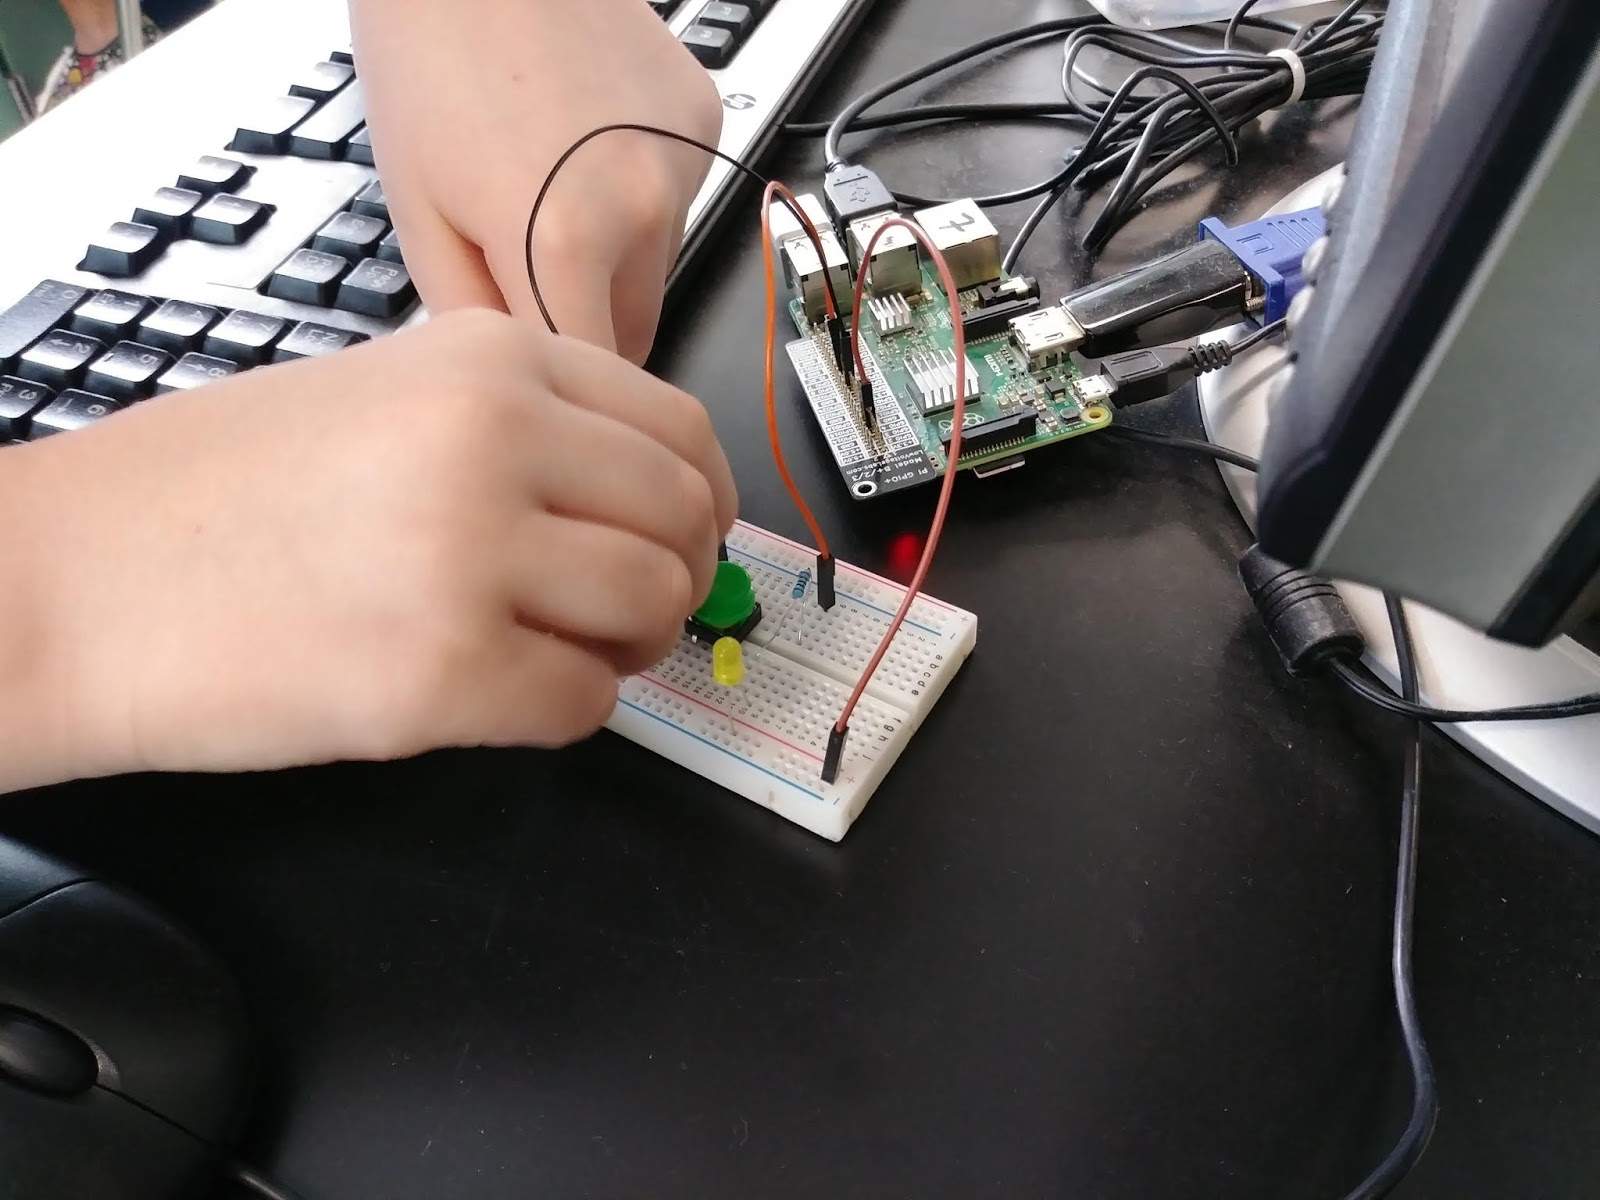
We started the week building circuits with LEDs and buttons on a breadboard. For this step students powered their lights with batteries, so no programming was done. Their previous circuit building experience was evident as the students needed very little guidance to get the lights glowing. By the end of class most groups were asking for more LEDs and resistors and also wanting to know if I had larger breadboards they could use. 

The next day students started with a brief overview of the Raspberry Pi and how to connect their circuits to the input/output pins. The micro:bit used earlier this year has i/o pins as well, so the students all grasped this quite quickly. The Raspberry Pi includes a version of Scratch with a set of command blocks that can be used for physical computing. First the class used a diagram to build a simple LED circuit connected to the Pi. Next they built a short program to blink the LED at 1 second intervals. From there, the students bowled ahead adding LEDs to their circuits and additional commands to their code to create a dizzying variety of blinking patterns. The next day students continued working with their circuits, adding a button, and adapting the program to respond with blinky lights when the button was pressed. 

All of this was a lead-in to introducing the students to text-based programming. With the students feeling comfortable programming circuits in Scratch, I showed them a Python program side by side with a Scratch program with the same output: blinking an LED at 1 second intervals. We discussed which part of the Python code corresponded to the Scratch command blocks. Students returned to their computers with a packet of circuit diagrams and Python starter code. I was, as I often am, truly impressed with how quickly the students picked up on this new skill. Before long they were adapting the starter programs to blink more LEDs using more button inputs than I would have imagined.

Fifth Grade

The 5th graders finished their STEM lab careers with a full unit of text-based programming with Python on the aforementioned Raspberry Pi computer. They split their time between using the Python Turtle Art and Minecraft Pi Edition. The Turtle library is a set of tools for programming drawings and is also used to create games with Python. The Raspberry Pi used to include a version of the game Minecraft designed to be a virtual world students could manipulate with code. This feature is no longer available since Microsoft acquired Minecraft. Fortunately, it is still available to us because we are working with an older version of the Raspberry Pi operating system. As with the 4th graders, I gave the students a packet of sample programs to familiarize them with the basics, and then encouraged them to adapt, alter, and experiment with the programs to create their own unique outputs. They did not disappoint. Their screens were filled with kaleidoscopic Turtle drawings and Minecraft worlds awash in towering pixel art sculptures, lava waterfalls, and TNT produced craters. 

And then came the wind...

I had this final post about 70% written, just needing a few final notes and a few more pictures, when the storm blasted our campus. Suddenly I was back on my pandemic era cart pushing into other people's classrooms and trying to maintain at least some vague semblance of my plans. Mr. Zogg's 2nd grade class was moved to the lab and so to make room for them I was obliged to pack up the Raspberry Pi kits. Some of the projects described above I have been able to implement as planned for the most part. However, I have had to switch gears entirely for the 4th graders. The worst part has been missing out on seeing the last two 5th grade magnet groups and the awesome things I know they would have created with Python. 

It is too early to say at this point what the beginning of next year will look like. I am hopeful, and trying to be optimistic, that I will be housed in the STEM lab once more when August arrives. In a very real sense my class is the STEM Lab's physical space, and when I cannot have class there, some elements of the class are lost. (I would never have students engage the kinds of beautiful, creative chaos we get up to in the lab, with its attendant cardboard scraps and drippy glue, in another teacher's room.) Whatever the situation may be in August, we will meet it with perseverance, creativity, and playful, personally meaningful projects.

Have a wonderful, safe summer. 

Sunday, February 17, 2019

Animated Artworks

It has become my habit in the STEM Lab to experiment, so to speak, on the 5th graders. When I devise a new project or new activity or practice, I find it useful to try it out on the group of students who will have gone on to middle school next year. That way, the necessary tweaks and alterations can be made for the following year. This unit is not entirely mine as much is adapted from a number of different activities I have seen done by my various Twitter friends.


Having said that, this is very much an experimental unit in which the 5th grade has been working. It is no secret that I do all that I can to bring concepts and skills from other subject areas into my lab projects. I have wanted to implement a unit with a fine arts focus for a while, and I felt like the 5th graders finally had the requisite physical computing skills to be successful. The project involves students creating their own interpretations of a famous artist's work, both digitally and physically.

Students started by doing some research into the life and work of a particular artist. The first two rotation groups got Vincent Van Gogh (because the first group was shorted 3 days due to various interruptions) and the third group is at work on Claude Monet. (I have not settled on an artist for the last group, yet.) These were chosen because they have a wide range of works to choose from. Students selected a work and sketched it into their notes. This gave me the chance to teach some basic drawing techniques which was a novel experience.


Next, students used Scratch to create an animated version of the painting they selected that also shared information about their artist. First they had to download an image of the painting. We used Wikimedia Commons for this because the images are free to use with attribution (which is another thing I have been working to get students in the habit of, citing their sources). They then uploaded that image into Scratch as a background. All of that is something they have learned previously. The next bit, however, took a little practice. They uploaded the image of the painting again, this time as a sprite and used the paint editor tools to erase most of the painting, leaving only the piece they intended to make move with code. In Van Gogh's "Starry Night" this may have been the moon or the clouds, in Monet's "Tulip Field" it was the flowers or the windmill blades. That sprite was then placed exactly over its corresponding place on the background so that it would only appear as a separate element when then triggering event key was pressed. Students repeated this process until they had at least 3 different animated elements in their chosen work. They also added a sprite that told about the life and work of their artist.

Here are a few example projects:
Van Gogh, Irises
Van Gogh, Starry Night
Monet, Boat on the Epte

The second part of the unit moved us into the realm of physical computing with the Raspberry Pi. First I introduced students to the Explorer HAT add on board. It is a self contained set of inputs and outputs capable of running both LEDs and motors. It has a small breadboard (which students learned to use last year) on top for building the circuits. Students are able to program the lights and motors using Scratch, albeit an older version which takes a bit of getting used to for them. Armed with their upgraded skills, students worked in teams to use the Scratch paint editor to create a digital interpretation of their chosen painting. This too takes some practice, but it also allows them to get creative with how they accomplish the drawing. Some use the shape drawing tools and fill them with color, while others use the line drawing tools. Meanwhile, the other partner is drawing the same painting on paper with colored pencils and markers. Both drawings done, the physical and the digital, teams added 2 LEDs to different places on their drawing, wired them to the Raspberry Pi, and programmed them to light up on different key presses. They also drew and cut out a detail from their painting, attached it to the the axle on a motor, and added the motor to the drawing as well. This was programmed to spin on a key press. The lights and motors matched elements in their digital drawing that they had animated on screen, similar to what they did during week 1. They also added a sprite to talk about the artist and the painting.

At this point the rotations are about half over and I am generally pleased with how it has gone so far. I think for the future I will create a gallery of paintings and artists for the students to choose from. Hopefully that will lead to a greater diversity of projects in the gallery.


Sunday, January 6, 2019

It's Time to Light the Lights

For their second turn in the lab, fourth grade is taking their knowledge of circuits to the next level using the Raspberry Pi computer. During their classroom science lessons on electricity and circuits, students learned to create complete pathways for electricity using regular light bulbs and D-cell batteries. In this unit, they used the kinds of electromechanical components employed by digital makers, LEDs, breadboards, resistors, and tactile buttons.

We started by spending a couple of days getting acquainted with these new components. Students built simple circuits using a battery pack and an LED. Then they added a button that could be used to turn the light on when it is pressed and off again when it is released. They had a good deal of time to experiment and tinker adding more LEDs. An interesting discovery many students made is that the LEDs require slightly different voltages so depending on how the circuit was set up, some lights would not light together. My favorite part of this segment of the unit is, after getting all 4 of their LEDs glowing, the teams start clamoring for more lights.


After learning to control their circuits mechanically (with moving parts like a button), students moved to the Raspberry Pi stations to learn how to take control digitally (with computer code). They started by using an add on board called Traffic HAT. Traffic because it is a set of 3 LEDs in red, yellow, and green resembling a stop light, and HAT for Hardware Attached on Top. This saves them from the distraction of learning a new way of wiring the LEDs while also learning the programming constructs that are used to control the circuits. The versions of Scratch that are embedded in the Raspberry Pi operating system have extensions that allow for physical computing (using a computer to control or gather information from physical components like LEDs, motors, buttons, and sensors). This is my favorite part of the entire unit solely because of the excitement that sweeps the room as LEDs begin to blink. What inevitably follows is students tinker with their code creating new effects, then call out to their neighbors to show what they have done.


Next, after becoming comfortable with the coding and still using the Traffic HAT, students use a breadboard and wires to add a button that they can use to control their LEDs. They also learn that the button can be used to make things happen on the computer screen. It can make characters talk or move, backgrounds can be changed, and just about anything else they can imagine. After that, I remove the Traffic HAT and provide students with a box of components like those they used at the beginning of the unit so that they have to build all of their circuits from scratch. Their final task for the unit is to create a game of some kind that uses at at least two LEDs and one button. I provide them with a guide for making a multiplication facts game, but they have the freedom to make any kind of game they want. Some make the math game, while others make quizzes about dinosaurs, Texas history, or Pokemon.


As always, I have been genuinely impressed by all of the creative ways the students have applied their new physical computing skills to the creation of projects that represent their interests and personalities.


Saturday, March 24, 2018

STEM Lab Menagerie

Here goes another post that must begin with the lament that I have fallen behind in my posting. So many amazing things have been happening in the lab. The 3rd grade learned how to use the Micro:bit and made their own Micro Pets. Second grade conducted research about different habitats and then built museum displays to share what they had learned. Meanwhile Kindergarten and 1st grade extended their programming skills with our friend Robo-Mouse. With this animal theme in mind, I've decided to consolidate these grade level units into one post and to vow, yet again, to stay on top off my writing schedule in this current grading cycle.

So let's begin at the beginning, Kindergarten and 1st grade worked with the Robo-Mouse, though they used the robot in different ways. Kinder learned to assemble the tiles to copy mazes from the task cards and then to program Robo-Mouse to navigate to the cheese at the end. As they became more proficient, they began creating their own mazes, recording these on grid paper, and recording their algorithms as well. They worked in groups that changed each day so that they could learn to work with different people and experience multiple perspectives. Teams built mazes to challenge other groups and learned a lot about debugging in the process.


Most of the first graders used Robo-Mouse last year and so only needed a short refresher lesson before they were ready to go. I started them on a series of building challenges related to their mazes. "Build a maze in which the robot must turn left 3 times to get to the cheese" and "build a maze in the shape of a letter" were just a couple of them. They also worked with the algorithm cards to plan their solutions before programming the robot. The cards are a big help when debugging programs for the long and winding mazes they like to build. Flexible groupings were an important part of the unit for 1st grade too as they created lengthy algorithms, often with multiple solutions. At the end of the unit with first grade I brought out Scratch Jr, which they had not used much in class yet this year. I challenged them to create mazes and then to write a program that guided the character through that maze. Touching the walls was not allowed, so they needed to run their code through many iteration before it worked perfectly.
On to second grade now. I started with an overview of note taking practises on Brain Pop Jr and a scavenger hunt for information on Britannica School. I am working on building them up to the point where they can choose how to share their learning at the end of a unit and part of that is helping them to become more independent learners. After learning to use these resources, teams selected a habitat and one of the animals from that habitat to be the topics of their research. They took notes in their journals and then planned what their display would look like. Then using everyone's favorite building material, cardboard, they executed their plans. As they were building, I made a point of teaching best practises for attaching pieces of cardboard to one another. (I have instituted a ban on tape in the lab, but that is a rant for another time.) Each display was accompanied by a card describing the habitat and listing facts about the animal. I was impressed by the attention to detail so many of the groups put into their projects. Another part of these sustained builds is helping students become better long term planners. I often see them hurrying to be done in a 45 minute class period which never results in the best work.
Finally, third grade was introduced to the Micro:bit. I've written about that in previous posts this year, so I won't go on about it again. I spent a lot of time this unit working on the differences between inputs and outputs. I likened it to cause and effect which they are familiar with from the ELA lessons. At first, we focused on using a particular input each day to create different outputs. They learned to use the buttons, accelerometer, and I/O pins to scroll text, create pictures, and show animations. We also got out the alligator clips and LEDs to do some physical computing which everyone found really exciting. The final project was creating a model pet with the Micro:bit adding a layer of interactivity to their builds. I was really excited to see all of the different was the different teams used the Micro:bit. On most it was the face or mouth showing the different moods of their creatures. Some learned to use the music blocks to add sounds to their animals and several used the Micro:bit to animate flapping wings and wagging tails. It was a fun unit to teach and I am really looking forward to next year when this group starts using the Raspberry Pi now that they have this grounding in physical computing.


Saturday, February 17, 2018

Circuit Masters

Last year I introduced my 5th graders to the joys and wonders of physical computing, using a computer to program the behavior of components likes LEDs and buttons. My hope then was to eventually push physical computing down to 3rd, or even 2nd, grade. This unit sees the 4th graders take the next step in their computer science learning journey.

Students started by learning to use a breadboard, LEDs, resistors, jumper wires, and batteries to build simple circuits. Electrical circuits are not new to 4th graders, having covered them in science class already. However, these particular components are. We identified each part, discussed its function, and went over the proper handling of each. Students were then guided through building a complete circuit. As always, when that first LED blazed to life, the room was filled with gasps and sqeals of delight. (That NEVER gets old for me.) With one LED in place, the teams immediately set about adding more.


Having gotten them comfortable with the breadboard and other components, I introduced the tactile button. We started with a short overview of how the button works and compared it to the switches they had used in science class when studying circuits. So far they have all done well recreating the first day's circuit with the button from the notes in their journals. They also have thrown themselves enthusiastically into the challenge of controlling multiple LEDs with a single button. We wrap up these first few days by identifying the differences between series and parallel circuits, both of which they have now built and recorded in their notes.

Using a switch or button to control the flow of electricity is a mechanical process and something of a review for 4th graders. Memories refreshed on the topic of circuits, we moved into the substance of the unit, physical computing. In the lab we are fortunate to have 10 Raspberry Pi computers. Each is equipped with 40 GPIO pins (General Purpose Input/Output) and it is these that make physical computing possible. Students began with a basic introduction to the Pi and how it like a regular PC as well as how it is different. Among the many languages available to students on the Raspberry Pi is a version of Scratch with an extension that allows for physical computing. For the first day, so that they could focus on programming, and not on juggling LEDs and resistors, we used an add-on board called Traffic HAT. It has 3 gumdrop sized LEDs and an adapter that fits neatly over 4 of the pins on the Pi and greatly reduces the time it takes students to get to blinking lights. I am so proud of how the students have been working together to debug when programs don't work as expected. The best thing to see is when one team gets the lights going in some wild pattern and calls across the room, "Woah! Look at that!". The inevitable response is a chorus of, "How did you do that?". Soon the room is full of the sounds of genuine engagement as teams call out programming tips to their friends.


Students complete the unit by learning to use the breadboard and other components with the Raspberry Pi. First they add a button to control the start of the light sequence on the Traffic HAT. This usually proves harder than most of them think it will be. Again, there is lots of cooperative debugging and problem solving. With that task accomplished, they use LEDs, resistors, and buttons and experiment with programming the components to behave in different ways. This generally becomes an exercise in making the lights blink as fast as possible in the greatest variety of patterns.


This has been a fun unit and I am looking forward to next year with this group and pushing their digital making skills to the next level.


Tuesday, April 11, 2017

That is so cool! Physical Computing with Raspberry Pi

Last year I added Raspberry Pi computers to the STEM lab. My main reason for doing so was to have more computers available for my after school coding club. The more familiar I became with these amazing devices, the more I wanted to teach a whole Raspberry Pi unit to my regular classes. The problem was that I was not quite sure where or how to start. Then I was fortunate enough to be selected for the Picademy training held in Austin this past December. (I wrote about that amazing experience here.) This unit is the result of what I learned there. It is a work in progress, a "first attempt in learning" as they say at Picademy. I will take all of the lessons from this unit, including student feedback, and use that to plan Raspberry Pi units next year for at least 3rd, 4th, and 5th grade.

I decided to put the focus of this unit on physical computing, using a computer to control or respond to events in the real world. During the previous rotation in the lab, 5th graders learned to use a breadboard to build circuits using LEDs, buzzers, and buttons. These circuits were battery powered, so the set up was a little different. (That was the first thing I learned in fact, be explicit about the differences between wiring a circuit to a battery and to a Raspberry Pi.)

We started our physical programming adventure with an overview of the Raspberry Pi, paying special attention to how it differs from a "normal" computer. The Raspberry Pi was designed specifically for teaching computer programming and digital making skills to children and comes loaded with a number of programming tools and languages. One of those pre-loaded languages is Scratch. The students are already quite familiar with using the "broadcast" blocks in Scratch to tell stories and control the action of their projects. These same blocks are used to configure and control the GPIO pins that make physical computing possible. I started them off with blinking LEDs and then button operated LEDs. As red and green LEDs blinked to life, the room was filled with surprised gasps and exclamations like, "It worked!". It was one of these beautiful teaching moments when you know for certain that every student is engaged and genuinely excited about what they are doing. After their initial successes, students went wild adding LEDs and tinkering with the blink speed. The final challenge was to build a traffic lights arrangement of LEDS, operated with a button. This is a fairly complicated task, not because the sequencing of the lights is difficult, but because of the large numbers of broadcasts that are needed. I am proud of how the students I have had so far have persevered and succeeded. This part took a day longer than the two that I thought it would take, but that has not been a problem as it allowed the students extra time to experiment with their code.

.From Scratch, we moved on to Python which is text-based, unlike Scratch which uses blocks. I set them essentially the same tasks, blinking LEDs, buttons, and traffic lights, but this time they had to type everything. This took the necessity of careful attention to details to a whole different level. Python is extremely user friendly for students, but syntax and indentation does matter. At first, there many error messages. Once again, I had reason to be proud as my students, albeit with much grumbling about commas and capital letters, stuck to their work and overcame the challenges. Students having an understanding of the two languages also provided an excellent opportunity to compare them to highlight their similarities, and to dig deeper into computer science concepts like abstraction.


The final two days of the unit are a mini project in which students apply what they have learned to another program. The first group created a multiplication quiz game in Scratch with LEDs that light when the player answers, red for an incorrect response, green for the correct one. This the end of the second rotation and the students are just starting these final projects. I am experimenting with giving them a choices of final product. A few selected the multiplication quiz (those with a pronounced preference for Scratch), but most elected to work through a tutorial on programming Minecraft Pi with Python leading up to combining physical computing with events in the Minecraft world. I am so excited to see how these projects turn out, and to see what the next 2 groups achieve.


Saturday, February 18, 2017

We Need More LEDs!

We have had a busy start to the new year for the 4th and 5th graders in the STEM lab. Between half weeks, holidays, early dismissals, rain delays, and 5th graders going to camp; we have had to make some adjustments. However, we have persevered and filled our time with flashing lights and 3D design.

This unit has a two part focus, electric circuits and 3 dimensional design and printing. My goals for the electricity portion were to give the students more hands-on practice building circuits and to teach them to use bread boards and LEDs as a lead in to the physical computing unit coming up in the 4th nine weeks. As for the 3D design/printing, these classes have spent the year so far engineering and building with their hands in the physical world and I wanted them to have some exposure to designing objects in the digital realm.

We began our work on circuits by reviewing what students already knew about the topic. The students are all well versed in the vocabulary of electrical circuits, conductor, insulator, open and closed circuits, switches, and so on. We discussed the various components that we would be using and how they fit into the students' existing knowledge. New terms included resistor and breadboard. Most had heard of an LED but were not familiar with what it stands for, light emitting diode. We examined the breadboard and sketched out how the different sets of holes are connected. Then I talked the students step by step through setting up a complete circuit. The best part of this unit so far has been the loud "oohs" and "aahs" that have accompanied the moment that first LED begins to glow. From there students build circuits using the remaining LEDs and resistors. In the next lesson, students are introduced to adding a button that turns their lights on when it is pressed. This exercise provides a great teachable moment in debugging circuits because there is always a group or two that wires the button in such a way that it turns the lights off by creating a short circuit when it is pressed. Once the students master the button, I have them add a buzzer. (Truth be told, these buzzers are much louder than I thought they would be when I ordered them.) The final challenge is then to connect all 5 LEDs and the buzzer to the button. Because of the small size of the breadboards we are using, the students must figure out how to use both halves of it in order to connect all of the components.


The materials for this part of the unit were provided by the generous individuals who supported my Donors Choose grant earlier this year. I cannot thank them enough.

The other half of this unit centers on the principles of 3D design and 3D printing. Students use a series of lessons provided by Project Ignite to learn hoe to use the tools in Tinkercad. This elementary computer assisted design program allows students create 3 dimensional objects digitally. These can then be printed on the classroom 3D printer. Students must complete the lessons and demonstrate mastery of the vocabulary and tools before being allowed to design and print an original object. One issue that keeps cropping up is that students get distracted designing some truly amazing things mid lesson and lose track of what they are supposed to be doing. (I suppose they are staying true to the spirit of tinkering.) A number of students have been able to print so far, and many more have completed the lessons and will be able to design and print during the next rotation. Moving forward, this year and into next, I will have students design and print objects not for their own sake, but as parts of other projects.