I spent last Thursday and Friday failing repeatedly, and it was the best teacher development I have ever had! The facilitators encouraged us to fail, they expected it, and were not in the least dismayed when we did. All 40 of us failed over and over, and rejoiced in the freedom we had to do so. However, over the course of the 2 days, all of our failures added up to enormous success. This was Picademy, where F.A.I.L. stands for First Attempt In Learning.
If you are not familiar with the
Raspberry Pi, you can check it out here. Basically, it is a small, but versatile computer designed by the Raspberry Pi Foundation in the UK to introduce children to computer science and coding. It comes pre-loaded with several coding languages like Scratch and Python. It also has accessible input/output pins making it possible for students to experiment with physical computing; controlling lights, sounds, and motors using code. We have 6 of these in the STEM lab which have heretofore mostly functioned as extra computers. I knew that I had not been using the Pi to its fullest, but as it does so much, I had no idea how or where to begin with the students. Then I learned about Picademy.
In September I found out that there was to be a Picademy in Austin at the Texas Advanced Computing Center (TACC), I applied immediately and then crossed all of my fingers and toes that I would be accepted. Frankly, my hopes were not too high. Only 40 educators are selected for each session out of hundreds of applications. I was pretty sure that my tremendous lack of experience with computing, educational technology, and digital making would get me a very nice "Thank you for applying, but..." letter. To my immense surprise and joy, on Halloween, I received an email that I had been selected to attend Picademy.
I spent the 5 weeks between that email and this past Thursday and Friday pondering just how out of my league I would find myself when I arrived in Austin.
Day one started with that most Texas of teacher training traditions, breakfast tacos. After a brief overview of the coming days and introductions all around, our facilitators taught us the Picademy motto: FAIL. They warned us that we would make mistakes, that we would feel overwhelmed, and that we may feel uncomfortably out of our depth. However, a fail, we were constantly reminded, is just a first step in the learning process. Assured that we had the freedom to fail, and that we would have the support to keep trying, they lobbed us into the deep end of computing with Raspberry Pi. We blinked LEDs with Scratch and Python, first one, then a set of traffic lights. We made music (or in my case discordant noise) using Sonic Pi. In Minecraft Pi we teleported, built towers, and turned everything we touched to gold with Python. With the Pi Camera we took pictures and movies, we used the Explorer HAT to drive motors and control more LEDs. And, and, and!
 |
| PiCamera photo booth |
That afternoon, we toured the
Texas Advanced Computing Center which was amazing. It is part of the University of Texas and is home to some of the fastest computers on Earth. Most are used to run simulations and forecast models of events like hurricanes, black hole collisions, and chemical interactions between materials. They have projects dealing with machine learning, public health issues, and genetics. It is a fascinating facility.
 |
| PiCamera photo effects |
Our final assignment on the first day was to brainstorm project ideas. The second day of a Picademy is largely devoted to applying what one learned on day one to a project of some kind. This proved to be a tough task as I was in the throes of a full scale information overload. I was trying to think of a project that I could work on that would, in some form, be within the abilities of the the students I teach once they were more familiar with the Pi. Still, I did what I could to think of ways to apply my learning and hoped that I would be able to remember enough of it to use on Friday.
Day 2 started with some amazing speakers. Marc Scott talked about the open source educational resources movement. Amanda Haughs discussed using Raspberry Pi in the K-5 classroom. We heard more about the work done at TACC from the director, Dan Stanzione. Finally we heard from a 14 year old entrepreneur from Houston, Ethan, who started his own computer company,
PCs for Me. He sells Raspberry Pi starter kits and accessories. Ethan talked about some of the projects he is using Raspberry Pi for in his classes this year.
After that healthy dose of inspiration, it was time to form a team, select a project, and get started. Matt, our lead facilitator, likened it to one of those cake baking competitions they have on TV. Teams would have 4 hours to work. At the end of that time, they would have to transport their project to the auditorium and present their work to the rest of the cohort.
 |
| Whiskers ready to dispense teaching wisdom |
I was lucky to have my partner in all things also be accepted into Picademy (something that we never thought would happen). We had worked out an idea that morning as we drove to TACC. Our aim was to build a robotic virtual teaching coach who could dispense advice any time a teacher might need it. When they gave the word, we grabbed some art supplies, an Explorer HAT, a couple motors, and a handful of jumper wires and got started.
We elected to use Scratch as our programming language because it is something with which we and our students are very familiar. The Explorer HAT was selected because it can be programmed using Scratch, and can control both LEDs and motors simultaneously. To summarize the process, there was much failure. Our code needed a fair bit of debugging before it functioned to our liking. We needed help from just about every facilitator in the room and several cohort members as well to find the correct commands to light our lights and move our motors. Then there was the actual construction of Whiskers and his mountain top temple of educational wisdom. We did not have time to get all of the sound effects in that we wanted, but in the end we were pretty happy with our work. Whiskers asks for the user's name and then offers them a chance to ask a question. He then thinks for a moment and says helpful things like, "Let's talk about that in PLC next week", "You're an amazing teacher, you've got this", and "Have you tried Donors Choose?".
 |
| Set up and ready to share our project |
The other presentations were great! There were several projects that used Twitter. One tweeted when a program monitoring temperature reached a certain level. Another took a picture and tweeted when a student left class for the nurse, office, or restroom. There was even a motion activated classroom pet movement camera that sent tweets. There was a Minecraft project that used the Sense Hat to search for gold underground so that the player would know where to dig. Another Minecraft project used the Pi Camera to take a picture and then rendered it in Minecraft blocks. One group built a station for creating audio books, another gutted a stuffed bear and fixed it to play lullabies and take pictures when shaken, and one built an Explorer HAT controlled scribble-bot. It was truly inspiring to see so much success after all of our first attempts in learning. Frankly there were too many amazing things to describe them all here. You can watch them all
here. FYI, the movie is about an hour long.

After all teams had presented, we were officially recognized as Raspberry Pi Certified Educators. We took turns walking to the front to be presented with our certificates and pins to the stately strains of Elgar's "Pomp and Circumstance". Then it was time to pack up and head for home. I cannot say a big enough thank you to the whole Picademy team. Matt, Marc, Amanda, Matthew, Courtney, and Venus, along with the wonderful people from TACC, made this one of the absolute best trainings I have ever had the pleasure to attend.

My brain is still a little bit overloaded with ideas that will need to be tamed and organized over the coming days. I am already working with other participants from the Houston area to have a get together in January so that we can continue to inspire and help each other to move our Raspberry Pi plans forward. The people were pone of the best parts of Picademy. There are so many dedicated, brilliant, and inspiring educators out there that I am so excited to learn from. For the classroom, I am working on Pi lessons for my after school clubs having gotten so many great ideas about where to start. I am working on developing a unit to teach to my 5th graders during the 4th nine weeks. Lessons learned from that experience will help me to adapt the unit for 3rd, 4th, and 5th grades next year. Doubtless more ideas and plans will follow as I continue to reflect on Picademy and engage with the wider Raspberry Pi community.
If you are a teacher looking for the best STEM training around, go to the
Picademy USA website and register your interest. They are hoping to hold 7 or 8 Picademy USA sessions in 2017.
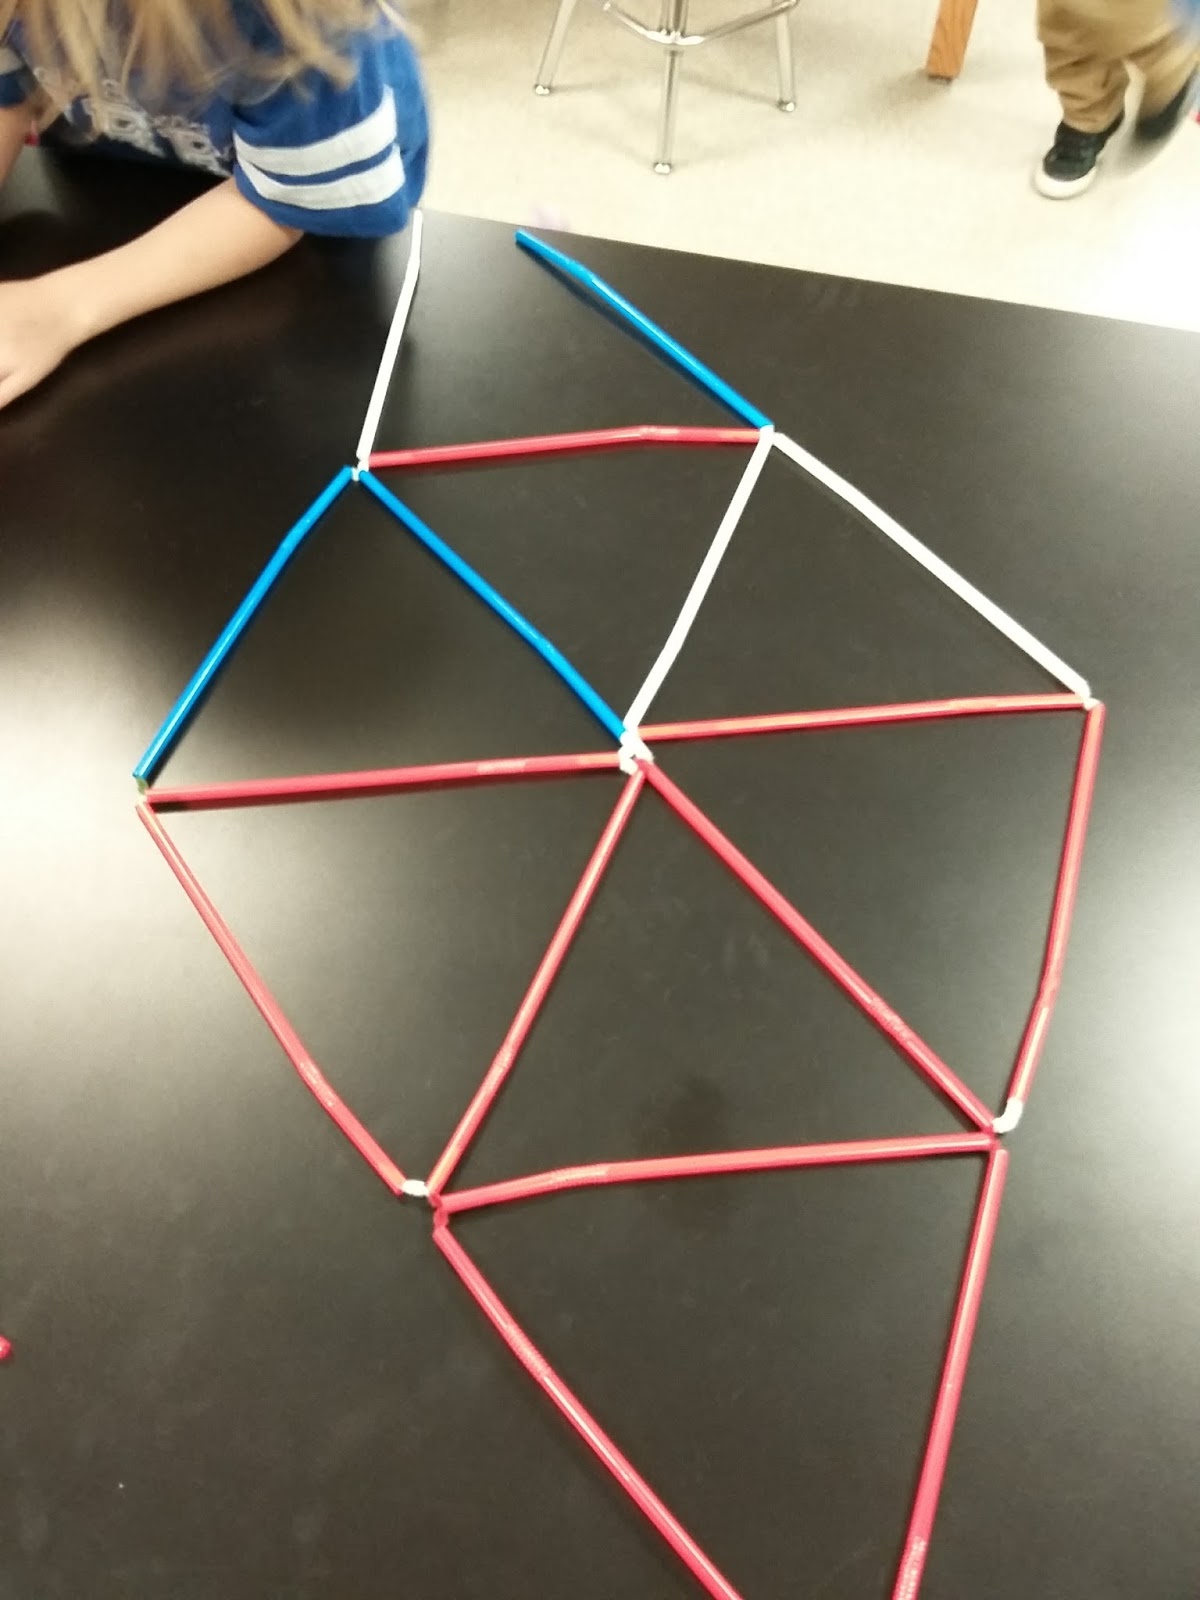
 The first two units of the year for kindergarten, first, and second grade were focused on computer programming and algorithmic thinking skills. They started with a unit of Code.org computer science, and then worked with robo-mouse and a bit of Scratch Jr. programming. I wanted their 3rd unit to move away from the computer for a while to do some hands-on building and making. I decided to divide the unit into two mini projects, the first focused on guided/directed building, the second much more open-ended.
 The theme of week one was architecture. We began by reading the book "Iggy Peck: Architect". It's the story of an architectural prodigy whose singular passion for building at first causes friction with his classroom teacher, but ultimately saves the day. For this portion of the unit, the building materials were drinking straws and chenille sticks. My plan was to have students start by building basic 2D shapes, and then connect those shapes to make more complex figures. However, a number of classes (1st and 2nd grades) had students who independently discovered the technique of using 2 chenille sticks in one straw end to construct 3D figures. This led me to differentiate the builds a bit to account for the different levels of building acumen. For kindergarten, we focused mostly on 2D shapes and identifying their attributes. Kinder did try their hands at 3D building, but for some the fine motor coordination was too much. With first and second I stuck to my original plan of a 2D day, a 3D day, and 2 building challenges.
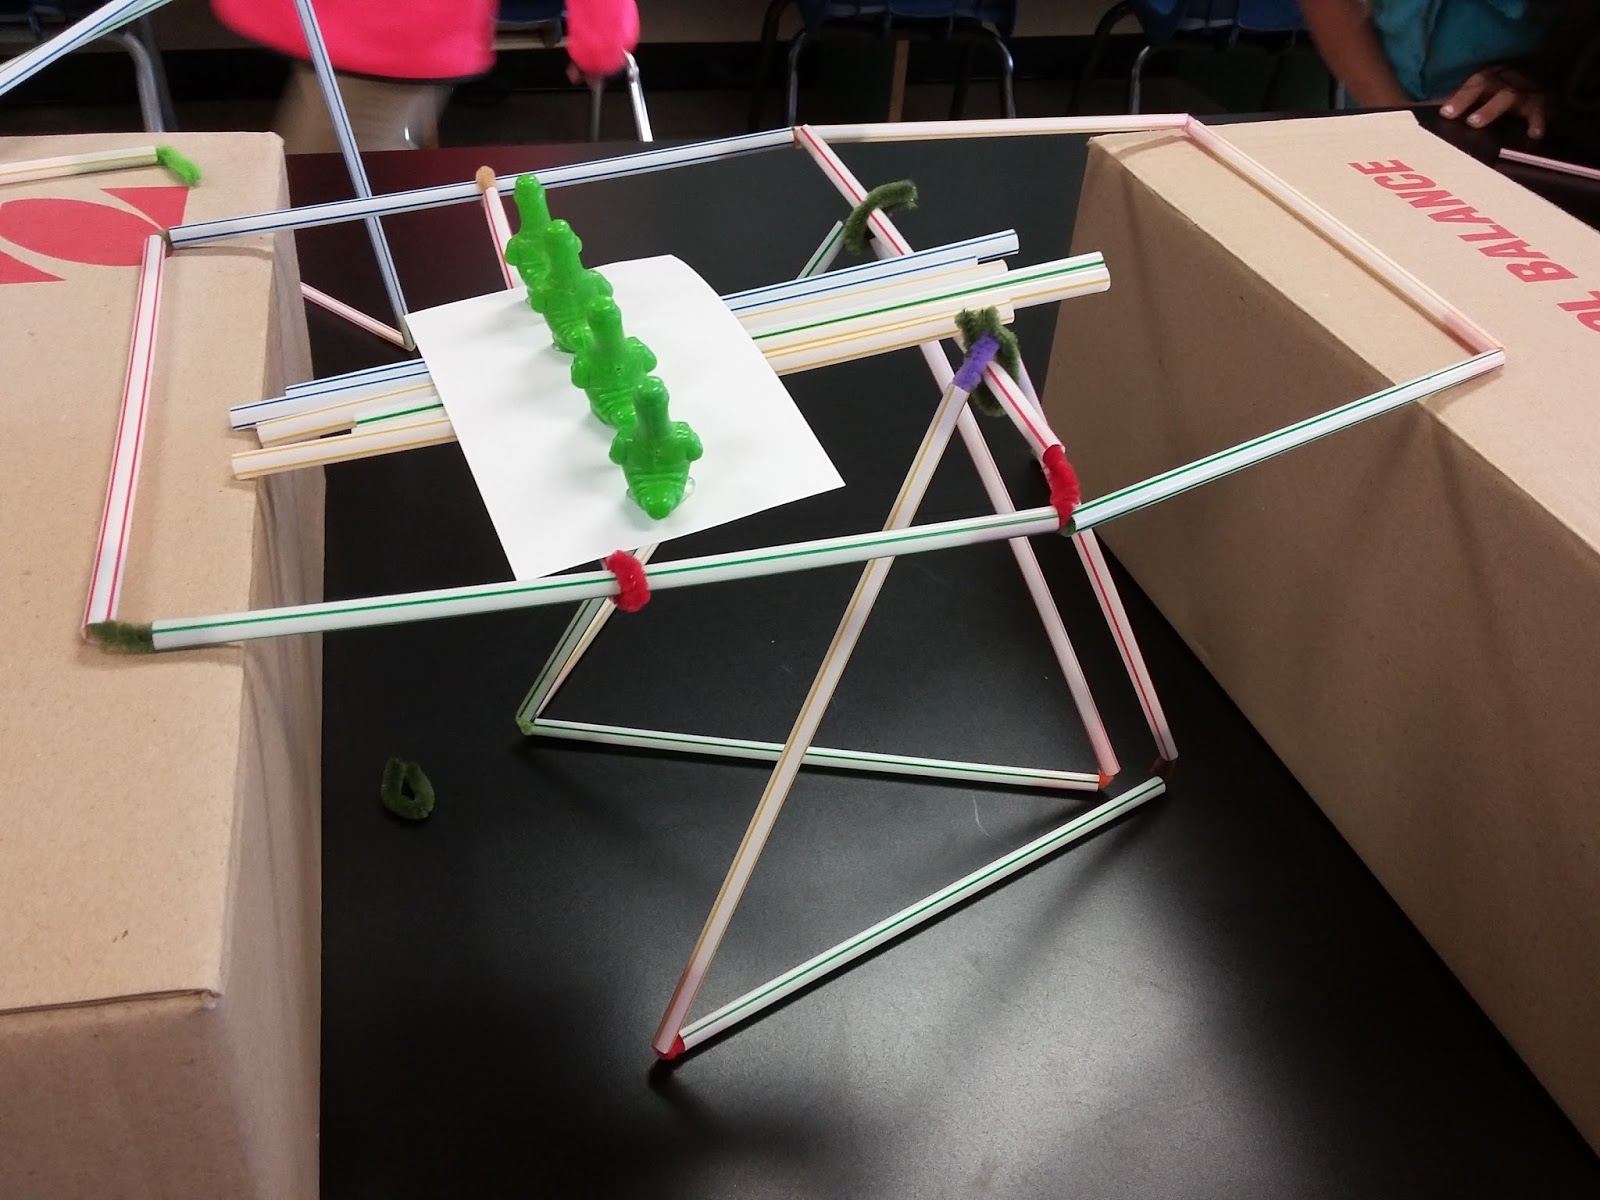 Building challenge number 1 was to construct a tower that would hold a ball several inches off the table top. This challenge provided an excellent lesson in keeping one's focus on the intended function of the structure. In each rotation I had groups that built amazing towers over 2 feet tall, but that did not manage to elevate the ball because their focus was on building up, not for holding the ball. Another teachable moment from this challenge was that triangles are more stable than squares. Many groups built structures that could hold the ball, but that twisted and fell due to a lack of support when the ball was added. Some teams kept building past the point that was necessary because they did not think to test what they had built. That said, each class had teams who managed to build something to hold the ball.

 The second building challenge was a bridge the could span a 12 inch distance between 2 boxes. Again, there were groups who lost sight of what they were building for and dismantled workable models because they did not take the time to test their structures. Some teams built simple beam structures, while others built triangular supports and overhead trusses.The most impressive part of the bridge challenge was seeing the students use what they had learned from failures in the first challenge to avoid making the same mistakes. As usual, with this and the first challenge, the students surprised me with their abilities and creativity.
 The second part of this unit was themed on animal adaptations. We started by looking at a variety of animals and discussed their various adaptations and how they were suited to survive in their environments. Students were challenged to design an animal that was a mash-up of two or more animals, incorporating both animals' adaptations. They had to explain how each adaptation contributed to their imagined animal's success in its particular habitat. First, students drew and labeled pictures of their animals highlighting the adaptation they thought were most important. Then they built a 3D model of their animal based on their drawing using a variety of upcycled materials. Finally, they constructed a model of the animal's habitat using a file folder and the same upcycled resources they used for their animal models.
 This portion of the the unit was hard on those students who are not yet fully comfortable with the creative freedom I strive to provide in the lab. They kept asking questions that started "Can I..." and "Is it OK if..." and so on. Building my students' creative confidence has been one of my personal goals this year and this unit has shown me that, while things are not yet where I would like them to be, we are moving in the right direction. From the beginning of the year to now, there is a noticeable decrease in the number of students holding their work up to me and asking, "Like this?". And that is what I call progress.


